To repair a butterfly valve, you must first depressurize the system, remove the valve body, disassemble the components, clean and inspect for wear, replace damaged seals or seats, and carefully reassemble while testing for leaks.
You rely on your piping systems to run flawlessly, but a sudden leak or stuck valve can halt operations completely. Ignoring a worn seal or hard-turning handle only leads to catastrophic failure and costly downtime. Fortunately, executing a proper butterfly valve repair can swiftly restore your fluid control and protect your bottom line.
Why is butterfly valve repair essential for your system?
Butterfly valve repair is essential because it prevents hazardous leaks, maintains precise flow control, and extends the lifespan of your pipeline infrastructure. Neglecting a timely butterfly valve repair can cost you thousands in unplanned downtime.
What are the risks of ignoring maintenance?
Here is the truth: minor drips today often become major blowouts tomorrow. Routine checks prevent these disasters.
- Severe fluid leakage.
- Corrosion of adjacent piping.
- Total actuator failure.
How does repair save money?
Key Takeaway: Regular maintenance significantly lowers operational costs by avoiding total valve replacement.
| Repair Type | Cost Impact | Operational Benefit |
|---|---|---|
| Seal Replacement | Low | Prevents major leaks |
| Full Overhaul | Moderate | Extends lifespan |
Analysis: Addressing minor issues early clearly reduces long-term financial impact.
What tools are needed for butterfly valve repair?
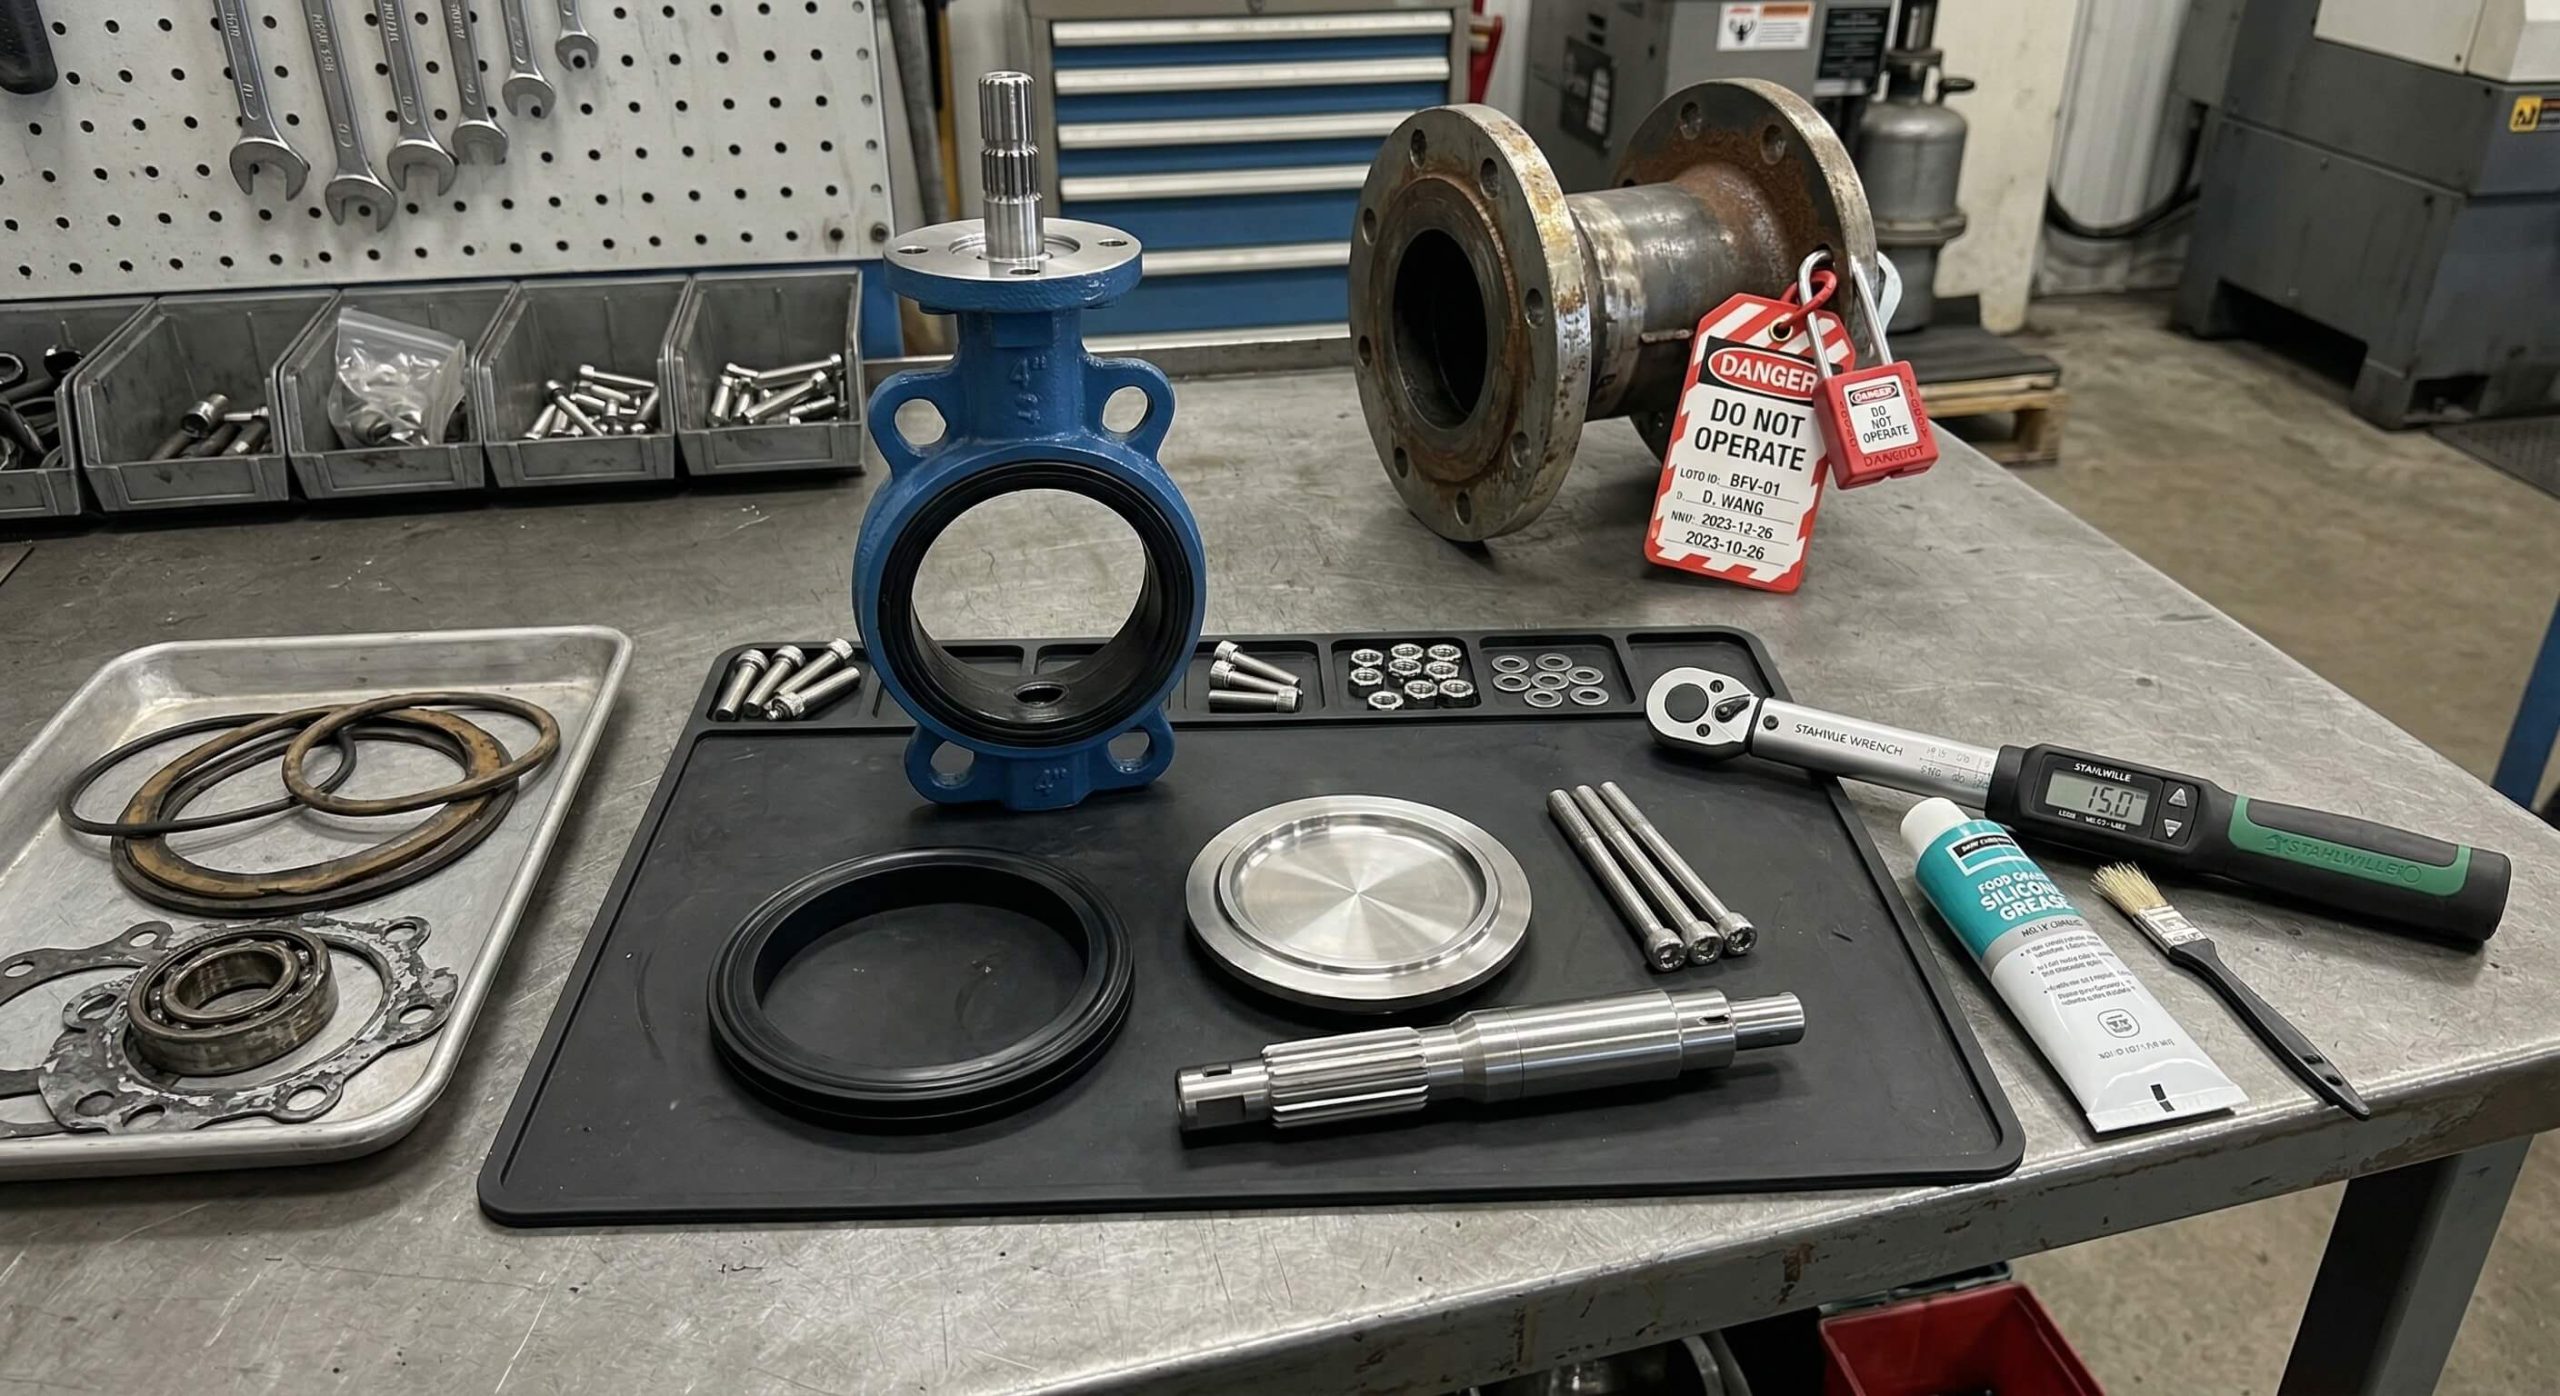
You need a torque wrench, screwdrivers, Allen keys, and replacement seals to successfully complete a butterfly valve repair. Having the right tools ensures the job is done safely and efficiently without damaging the valve’s specialized coating.
Are standard wrenches enough?
Let’s dive in: using the wrong tool can strip bolts or warp the delicate disc assembly. Specialized kits are always preferred.
- Torque wrench for precise tightening.
- Soft mallet for gentle component separation.
- Specific Allen keys for actuator removal.
Key Takeaway: Specialized tools prevent accidental damage to fragile valve bodies during service.
| Tool | Primary Use |
|---|---|
| Torque Wrench | Bolt tightening |
| Soft Mallet | Dislodging parts |
Analysis: Using the correct torque specification is critical for maintaining a tight, bubble-free seal.
How to prepare safely for butterfly valve repair?
To prepare safely for butterfly valve repair, you must shut off the flow, drain the line, and confirm the system is entirely depressurized. Proper preparation during a butterfly valve repair guarantees technician safety.
Why is depressurizing critical?
Picture this: unbolting a valve while internal pressure remains can lead to a violent “missile” effect. Safety first is the only policy.
- Prevents sudden fluid bursts.
- Protects workers from chemical exposure.
- Allows safe unbolting of flanges.
Key Takeaway: Never skip lockout/tagout procedures before touching a pipeline to ensure power remains off.
| Safety Step | Consequence if Missed |
|---|---|
| Shut off flow | Flooding |
| Depressurize | Physical injury |
Analysis: Strict adherence to safety protocols is non-negotiable for any industrial maintenance task.
What are the disassembly steps in butterfly valve repair?
The disassembly steps in butterfly valve repair involve removing the actuator, unscrewing bolts evenly, and sliding the body out gently. Careful extraction during a butterfly valve repair prevents cracking the brittle flange surfaces or scratching the internal bore.
How do you safely remove the disc?
But wait, there’s more: the disc is the heart of the valve and must be handled with extreme care to avoid nicks.
- Mark alignment positions.
- Pull the stem straight out.
- Slide the disc from the seat carefully.
Key Takeaway: Labeling parts during disassembly ensures you won’t get confused during the reassembly phase later.
| Component | Removal Action |
|---|---|
| Actuator | Unscrew mounting bracket |
| Stem | Pull vertically |
Analysis: Sequential disassembly protects internal mechanisms from bending or losing their factory calibration.
How to inspect parts during butterfly valve repair?
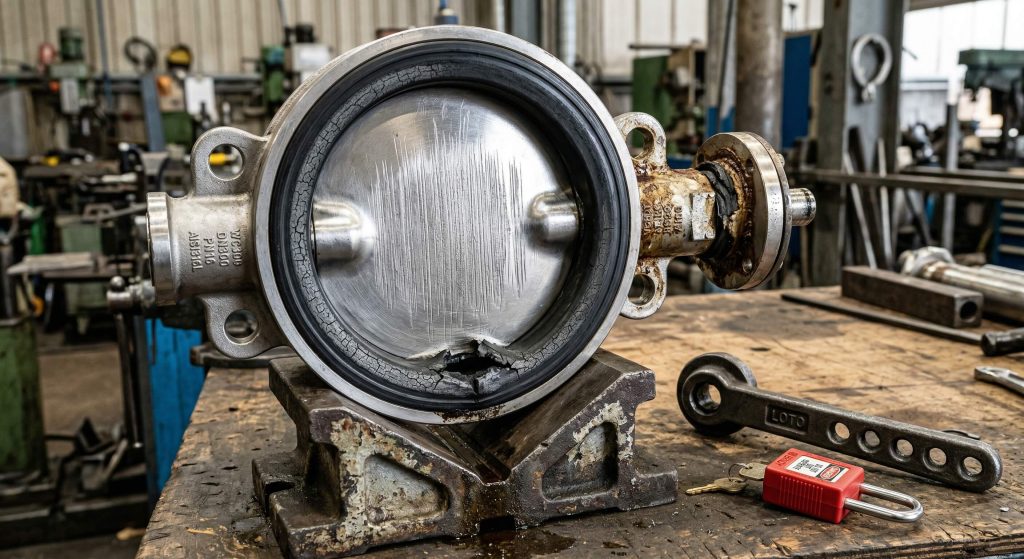
You must thoroughly clean components and check for corrosion, wear, or warping to properly inspect parts during a butterfly valve repair. A meticulous inspection is the cornerstone of an effective butterfly valve repair.
What signs of wear should you look for?
Consider this: even a tiny scratch on a sealing surface can lead to thousands of gallons in wasted fluid over time.
- Deep scratches on the disc edge.
- Flattened or brittle O-rings.
- Rust on the metal stem.
Key Takeaway: Identifying microscopic wear today prevents macroscopic system failures tomorrow.
| Part | Wear Indicator |
|---|---|
| Seat | Cracks or tears |
| Disc | Heavy scoring |
Analysis: Replacing compromised parts immediately is significantly cheaper than dealing with a second emergency breakdown.
Which components need replacement in butterfly valve repair?
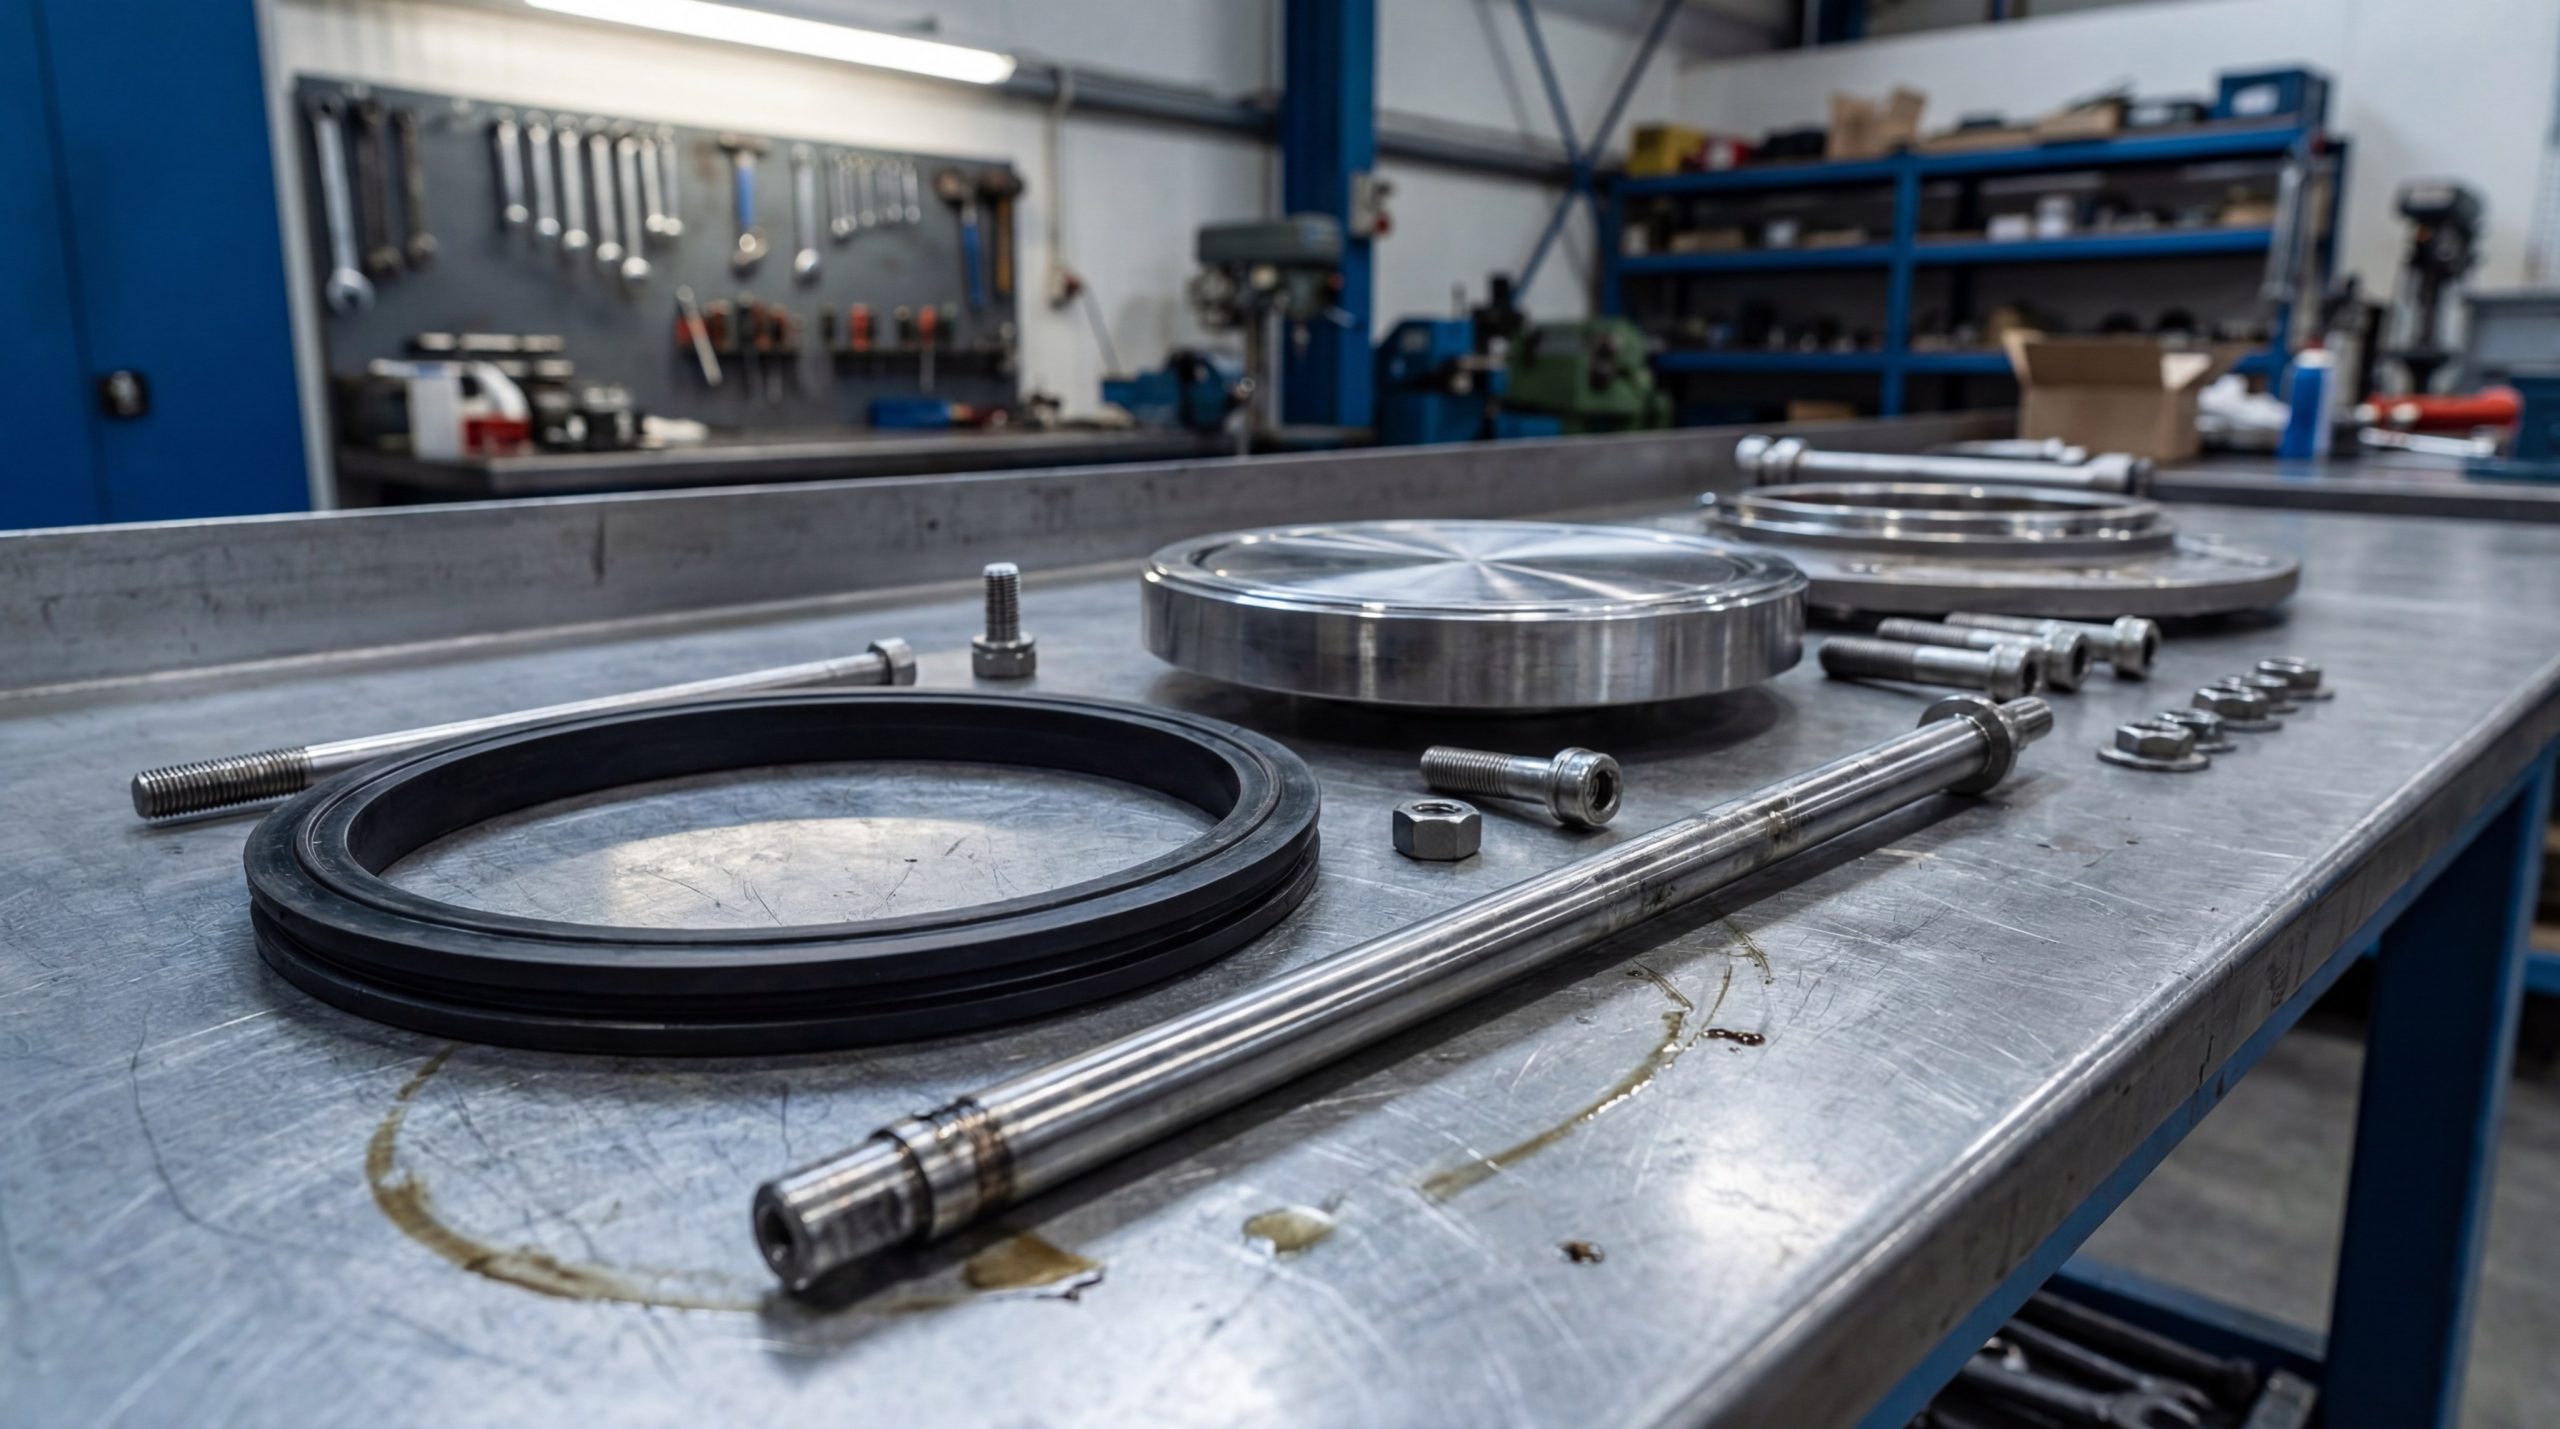
The seat seals, O-rings, and shaft bearings are the components that most frequently require replacement in butterfly valve repair. Identifying these worn items is a routine part of any standard butterfly valve repair to ensure the unit returns to factory standards.
Why do seat seals fail so often?
Think about it: the seat faces constant mechanical stress and chemical attack every time the valve cycles.
- Constant friction from the disc.
- Exposure to harsh chemicals.
- Temperature fluctuations.
Key Takeaway: High-quality replacement seals dictate the future reliability and shut-off capability of the valve.
| Component | Lifespan Factor |
|---|---|
| Rubber Seat | Media temperature |
| Metal Stem | Torsional stress |
Analysis: Selecting OEM-compatible parts ensures exact fitment and maximum longevity for the repaired unit.
How to execute reassembly in butterfly valve repair?
To execute reassembly in butterfly valve repair, you must reverse the disassembly order, align the disc perfectly, and torque the bolts in a criss-cross pattern. Precision during the reassembly phase of a butterfly valve repair is vital for a leak-proof seal.
What is the correct bolting sequence?
Let me explain: tightening one side too fast can tilt the valve body, leading to an uneven seal and immediate failure.
- Hand-tighten all bolts first.
- Use a star pattern for initial torque.
- Apply final torque specifications evenly.
Key Takeaway: Uneven tightening will pinch the seat and cause immediate leakage once the line is pressurized.
| Step | Method |
|---|---|
| Alignment | Center disc in seat |
| Torquing | Star pattern |
Analysis: Proper alignment prevents binding when the valve is put back into high-frequency service.
What lubrication is best for butterfly valve repair?
A high-quality, manufacturer-approved grease or synthetic lubricant is best used on stems and threads during a butterfly valve repair. Proper lubrication reduces friction and ensures smooth operation after your butterfly valve repair is complete.
Can you use standard grease?
The answer might surprise you: many standard greases contain petroleum that eats away at rubber seats and seals.
- Standard grease may degrade rubber seats.
- Food-grade lube is required for sanitary lines.
- High-temp environments need specialized compounds.
Key Takeaway: Applying the wrong lubricant can destroy the valve from the inside out within weeks.
| Lube Type | Best Application |
|---|---|
| Silicone Grease | Rubber O-rings |
| Anti-seize | Flange bolts |
Analysis: Material compatibility with the fluid media must dictate your choice of industrial lubricant.
How to test the system after butterfly valve repair?
You must cycle the valve manually and observe for leaks under low pressure to properly test the system after a butterfly valve repair. Testing validates the success of your butterfly valve repair before fully returning to service.
How many test cycles are required?
Here is the trick: a single cycle isn’t enough to seat the new components properly under real-world stress.
- Cycle fully open to fully closed 5 times.
- Inspect the stem packing during movement.
- Gradually introduce system pressure.
Key Takeaway: Controlled testing prevents sudden blowouts and costly fluid loss on the factory floor.
| Test Phase | Action |
|---|---|
| Dry Run | Manual cycling |
| Wet Run | Low pressure check |
Analysis: A successful test run guarantees operational readiness and technician peace of mind.
How to prevent future issues after butterfly valve repair?
Implementing a routine maintenance schedule and monthly visual inspections will prevent future issues after completing a butterfly valve repair. Proactive care reduces the frequency of needing a full butterfly valve repair significantly.
What should a maintenance schedule include?
Moving forward: proactive maintenance is the only way to shift from reactive firefighting to smooth operations.
- Monthly cycling of unused valves.
- Quarterly leak inspections.
- Annual lubrication of actuators.
Key Takeaway: Consistent monitoring is the easiest way to maximize valve lifespan and return on investment.
| Frequency | Maintenance Task |
|---|---|
| Monthly | Visual leak check |
| Annually | Full diagnostic |
Analysis: Preventive maintenance transforms reactive emergencies into scheduled, manageable tasks.
Conclusion
In summary, mastering the steps of repair ensures your pipeline remains safe and operationally efficient. This guide has detailed the necessary tools, safety preparations, and precise reassembly steps to get your flow control system back online. We provide top-tier industrial solutions designed for durability across all fluid types. If you need expert assistance or specialized high-quality replacement parts to keep your operations running smoothly, contact us today. Our vision is to empower global industry with reliable, leak-free infrastructure.
FAQ
- Can I repair a butterfly valve while it is under pressure?
No, you cannot. You must always depressurize the system and drain the line to prevent severe injury or chemical spills. - What’s the best way to clean valve components?
The best way is to use mild soap and water or an approved industrial solvent. Harsh chemicals might degrade the rubber seats or O-rings. - How do I know if the seat seal needs replacing?
You will know it needs replacing if the valve leaks when fully closed, or if the rubber shows visible cracks, tears, or extreme hardening. - Can I reuse the old O-rings during reassembly?
No, it is highly discouraged. Old O-rings are usually compressed and brittle, meaning they will likely cause a leak if reused. - What’s the best tool to remove a stuck valve body?
A soft rubber or wooden mallet is the best tool. Striking it gently will dislodge the body without cracking the metal flanges.