You test a butterfly valve by subjecting the assembly to a series of pressure cycles, including a shell strength test and a seat leakage verification, to ensure it meets operational safety standards. When you operate a high-pressure system, a single hairline fracture in a valve body can lead to a catastrophic blowout. These failures don’t just stop production; they endanger your entire facility and result in massive financial liabilities. Implementing a rigorous butterfly valve testing procedure is the definitive solution to identify defects before they cause real-world damage.
Why is a butterfly valve testing procedure vital?
Testing is essential because it verifies the structural integrity and sealing capabilities of the valve under simulated extreme conditions. Without these checks, you risk installing a component with casting defects that could leak hazardous fluids.
Does testing prevent operational downtime?
Think about it: preventing one failure justifies the cost of a thousand tests. By verifying every component, you ensure that the system maintains steady flow without unexpected interruptions.
- Early detection of casting pores or cracks.
- Verification of seat material compatibility.
- Prevention of environmental contamination.
Key Takeaway: A formal testing protocol is your primary defense against industrial accidents and environmental non-compliance.
| Evaluation Metric | Benefit to Operations |
|---|---|
| Shell Integrity | Prevents explosive decompression. |
| Seat Tightness | Ensures complete system isolation. |
| Stem Sealing | Eliminates fugitive emissions. |
Reliable data shows that pre-installation testing reduces emergency maintenance costs by over thirty percent in heavy industrial applications.
What are the first steps in a butterfly valve testing procedure?
The first steps involve cleaning the valve of all debris and mounting it securely onto a calibrated testing bench. Following a standardized butterfly valve testing procedure ensures that you do not get false readings caused by external contaminants or improper alignment.
How do you prepare the test medium?
Here is the kicker: the medium you choose must match the sensitivity required for the specific valve class. Most industrial standards require filtered water with corrosion inhibitors for high-pressure strength tests.
- Remove all protective grease from sealing surfaces.
- Ensure the disc moves freely through its full 90-degree stroke.
- Check that all pressure gauges are currently within their calibration dates.
Key Takeaway: Meticulous preparation is the foundation of an accurate and repeatable pressure test.
| Preparation Step | Action Required |
|---|---|
| Debris Removal | Flush the valve body with clean solvent. |
| Gauge Check | Confirm accuracy within 0.5% of full scale. |
| Mounting | Secure flanges to prevent movement under load. |
Proper preparation eliminates the risk of damaging the valve seats with metal shavings during the initial pressurization cycle.
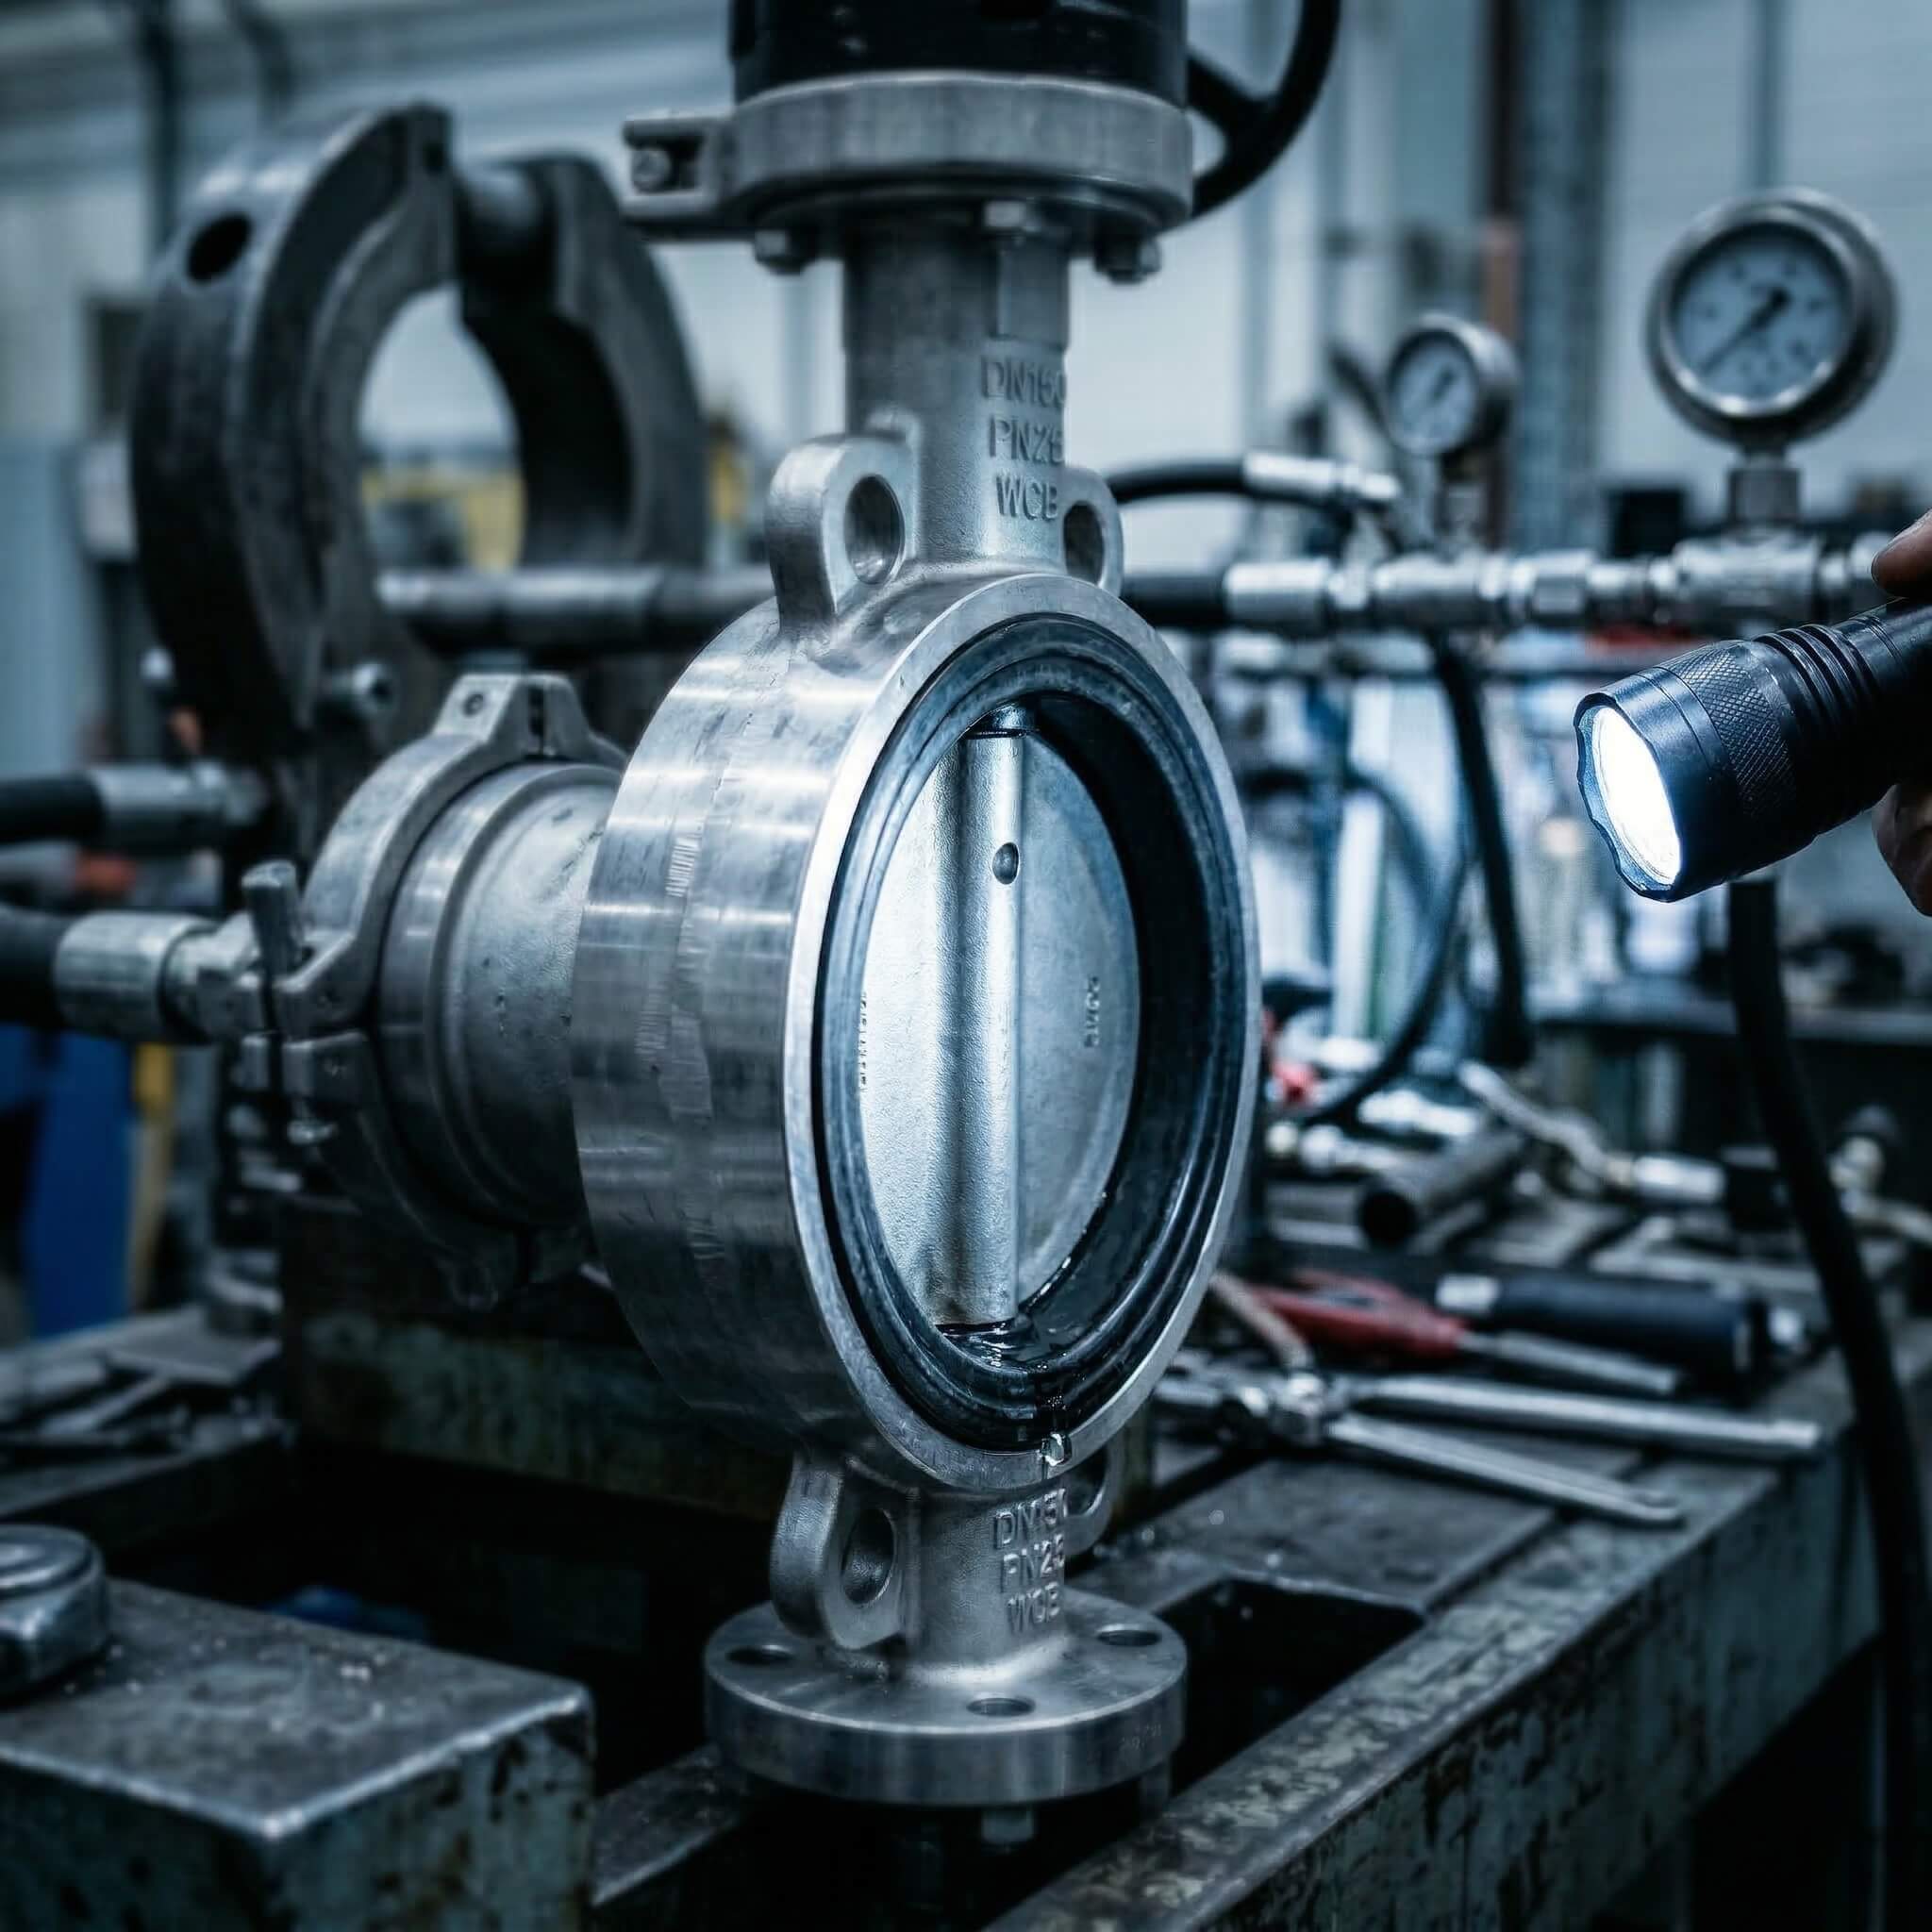
How do you perform a shell test for a butterfly valve?
You perform a shell test by partially opening the valve disc and applying pressure to the entire internal cavity to check for body leaks. This process subjects the metal housing and the stuffing box to stress levels significantly higher than the rated working pressure.
What pressure level is required for the shell?
You might be wondering: how much pressure is enough? Typically, the shell test requires 1.5 times the maximum allowable working pressure to guarantee a safe margin.
- Apply pressure gradually to avoid hydraulic shock.
- Maintain the pressure for the duration specified by the size class.
- Inspect the body, neck, and joints for “sweating” or visible leaks.
Key Takeaway: The shell test confirms that the physical casting can withstand the internal forces of your pipeline.
| Test Parameter | Standard Requirement |
|---|---|
| Disc Position | Partially open (usually 45 degrees). |
| Test Medium | Liquid (water) for safety stability. |
| Minimum Hold Time | 15 to 300 seconds based on diameter. |
The shell test is the most critical safety verification, as it identifies structural weaknesses that could lead to valve body rupture.
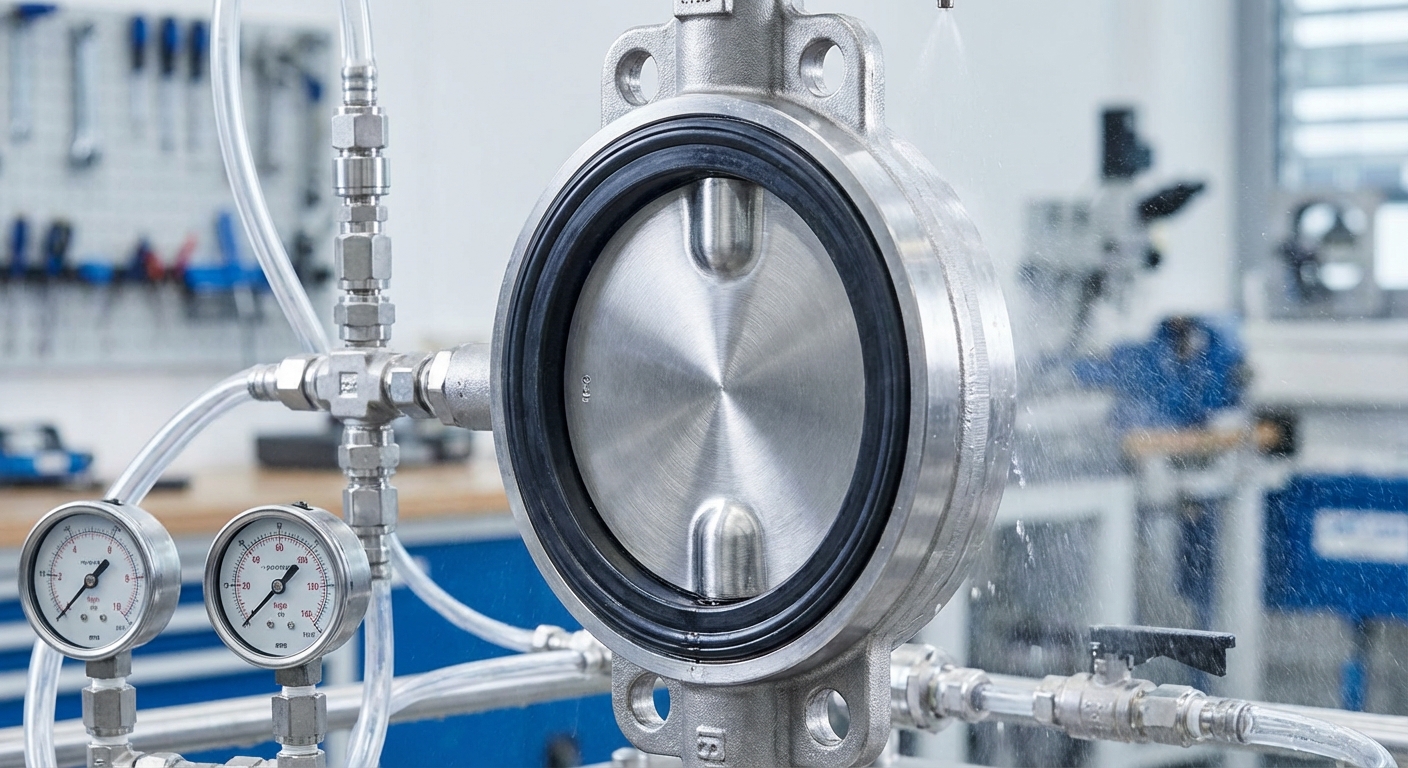
Is the seat seal part of the butterfly valve testing procedure?
Verification of the seat seal is a mandatory part of the butterfly valve testing procedure to ensure the valve provides tight shut-off. This test specifically checks the interface between the disc edge and the resilient or metal seat.
How is the closure test performed?
Believe it or not, even a tiny bubble can indicate a future failure. You close the valve completely and apply pressure to one side while observing the downstream side for any signs of bypass.
- Close the disc with the specified torque.
- Apply pressure from the upstream end.
- Monitor for leakage across the seat interface.
Key Takeaway: Seat testing ensures that the valve can effectively isolate different sections of your processing plant.
| Leakage Class | Allowable Rate |
|---|---|
| Class VI | Bubbles per minute (resilient seats). |
| Class IV | 0.01% of full flow (metal seats). |
| Zero-Leakage | No visible leakage for the duration. |
Achieving the correct leakage class is vital for applications where mixing of fluids must be strictly prevented during maintenance.
What equipment is used in a butterfly valve testing procedure?
Professional testing requires specialized equipment including high-pressure pumps, calibrated digital manometers, and hydraulic clamping benches. Using the right tools ensures that the butterfly valve testing procedure is conducted safely and provides data you can trust.
Why use an automated test bench?
The truth is: manual testing is prone to human error and safety risks. Automated benches provide consistent clamping force and precise pressure control that manual pumps simply cannot replicate.
- Hydraulic clamps for quick flange connection.
- Digital data loggers to record pressure curves.
- Safety shields to protect operators from high-pressure sprays.
Key Takeaway: Investing in high-quality testing equipment drastically increases the reliability of your quality assurance results.
| Equipment Type | Primary Function |
|---|---|
| Hydro-Pump | Generates high-volume liquid pressure. |
| Manometer | Provides high-resolution pressure readings. |
| Torque Wrench | Confirms the disc is closed to specification. |
Utilizing precision equipment allows for the detection of pressure drops as small as 0.1 PSI, which might indicate a slow internal leak.
Which standards guide the butterfly valve testing procedure?
International standards such as API 598 and ISO 5208 provide the specific rules for the butterfly valve testing procedure. These documents define the allowable leakage rates, test durations, and necessary safety factors for various valve materials.
Which standard is best for your project?
Keep this in mind: following the wrong standard can lead to rejection by your end-user. API 598 is the most common standard for oil and gas, while ISO 5208 is frequently used for general industrial water systems.
- Check the project specifications for the required standard.
- Ensure your testing facility is certified to perform these procedures.
- Document every test result to provide a certificate of compliance.
Key Takeaway: Adhering to global standards ensures your valves are compatible with international safety and quality expectations.
| Standard | Industrial Focus |
|---|---|
| API 598 | Petroleum and petrochemical industries. |
| ISO 5208 | Industrial valves for general applications. |
| MSS SP-67 | Specific design and test for butterfly valves. |
Standardization allows engineers to compare valve performance across different manufacturers using a level playing field of data.
How do you conduct a low-pressure air test on a valve?
A low-pressure air test is conducted by applying compressed air at approximately 80 PSI to the seat while the valve is submerged or coated with a leak-detection fluid. This method is exceptionally sensitive for finding small leaks that water molecules are too large to pass through.
When should you choose air over water?
The simple fact is: air finds leaks that water misses. For gas service or vacuum applications, a low-pressure air test is the most effective way to ensure a bubble-tight seal.
- Submerge the valve in a clean water tank.
- Look for a continuous stream of bubbles from the seat area.
- Maintain the pressure for at least 60 seconds.
Key Takeaway: Air testing provides a superior level of sensitivity for low-pressure gas isolation requirements.
| Test Medium | Sensitivity Level |
|---|---|
| Compressed Air | High (detects microscopic pores). |
| Water | Medium (best for structural strength). |
| Nitrogen | Very High (used for high-purity systems). |
Air testing is often a secondary requirement that supplements the high-pressure hydrostatic test for high-performance valves.
Are visual checks included in a butterfly valve testing procedure?
Yes, a thorough visual inspection is a mandatory component of the butterfly valve testing procedure both before and after pressurization. You must verify that the physical appearance of the valve reflects the quality indicated by the pressure data.
What should you look for post-test?
It gets better: visual checks can reveal damage caused by the test itself. You must inspect the stem for any permanent deformation or bending that occurred during the high-pressure cycles.
- Inspect the casting for sand holes or surface porosity.
- Check the seat for any tearing or displacement.
- Ensure the nameplate data matches the actual valve configuration.
Key Takeaway: Visual verification prevents the shipment of valves that are technically pressure-tight but physically defective.
| Inspection Point | Quality Indicator |
|---|---|
| Valve Body | Smooth casting with no visible cracks. |
| Disc Edge | No nicks or scratches on the sealing surface. |
| Actuator Linkage | Secure mounting with no loose fasteners. |
Combining visual inspection with pressure testing provides a comprehensive view of the valve’s overall health and expected service life.
How do you test actuated versus manual butterfly valves?
Testing actuated valves requires verifying that the pneumatic or electric drive can generate enough torque to close the disc against the full differential pressure. For manual valves, you focus on the ease of operation and the reliability of the locking mechanism.
Does the actuator need separate testing?
Here’s the deal: a valve is only as good as its operator. You must cycle the actuated assembly multiple times to ensure the limit switches and positioning are perfectly calibrated.
- Verify the actuator “fail-safe” position works correctly.
- Test the opening and closing speed under load.
- Check for any air leaks in the pneumatic supply lines.
Key Takeaway: Actuated valve testing must treat the valve and the drive unit as a single, integrated system.
| Operation Type | Critical Test Focus |
|---|---|
| Manual Lever | Locking pin engagement and handle strength. |
| Pneumatic | Air seal integrity and stroke timing. |
| Electric | Voltage draw and limit switch accuracy. |
Testing the full assembly ensures that once installed, the valve will respond correctly to signals from your control room.
What happens after finishing a butterfly valve testing procedure?
After finishing the procedure, you must drain all test fluids, dry the internal cavities, and issue a formal test report or certificate. This documentation serves as the legal proof that the valve is fit for service and safe for installation.
How do you protect the valve post-test?
Don’t miss this: leaving water inside the valve can lead to flash rusting before it even reaches the job site. You must use compressed air to blow out all moisture and apply a light protective coating if required.
- Complete the test report with all pressure readings.
- Apply protective end caps to keep out dust and debris.
- Stamp the valve body or tag it with the “Passed” status.
Key Takeaway: Post-test processing is what ensures the valve remains in “as-tested” condition during shipping and storage.
| Post-Test Action | Importance |
|---|---|
| Drying | Prevents internal corrosion and pitting. |
| Certification | Provides a traceable quality record. |
| End Capping | Protects seats from mechanical damage. |
Final documentation should include the signature of the quality inspector and the specific serial number of the valve for full traceability.
Conclusion
Testing is the definitive line between a safe industrial system and a potential disaster. By adhering to a strict protocol, you ensure that every component in your facility performs exactly as engineered. This rigorous verification process protects your staff, your assets, and your operational budget from the high costs of failure. We are committed to providing precision-engineered flow control solutions that exceed international testing standards. If you need assistance with certifying your equipment or selecting the right components for your next project, please contact us today to consult with our engineering experts.
FAQ
Can I test a butterfly valve using only air?
No, while air is great for seal testing, a hydrostatic strength test with water is required for safety when checking the valve body’s structural integrity. Air stores too much energy at high pressures, making a body failure potentially explosive.
What’s the best way to determine if a seat is leaking?
The most effective method is the “bubble test” under low-pressure air. By submerging the valve or using a leak-detection solution on the downstream side, even the smallest bypass becomes clearly visible as a stream of bubbles.
Can a butterfly valve be tested in both directions?
Yes, high-performance and triple-offset valves are usually designed for bi-directional sealing and should be tested from both sides to ensure full functionality. Standard wafer valves may have a preferred flow direction that dictates the primary test side.
How long must I hold the pressure during a shell test?
The duration depends on the valve size and the governing standard. For example, API 598 requires hold times ranging from 15 seconds for small valves to several minutes for large-diameter units.
What should I do if a valve fails the initial pressure test?
First, depressurize the system safely and check for simple causes like loose bolts or debris on the seat. If the leak persists, the valve may require a seat replacement or a check for body casting defects before being re-tested.