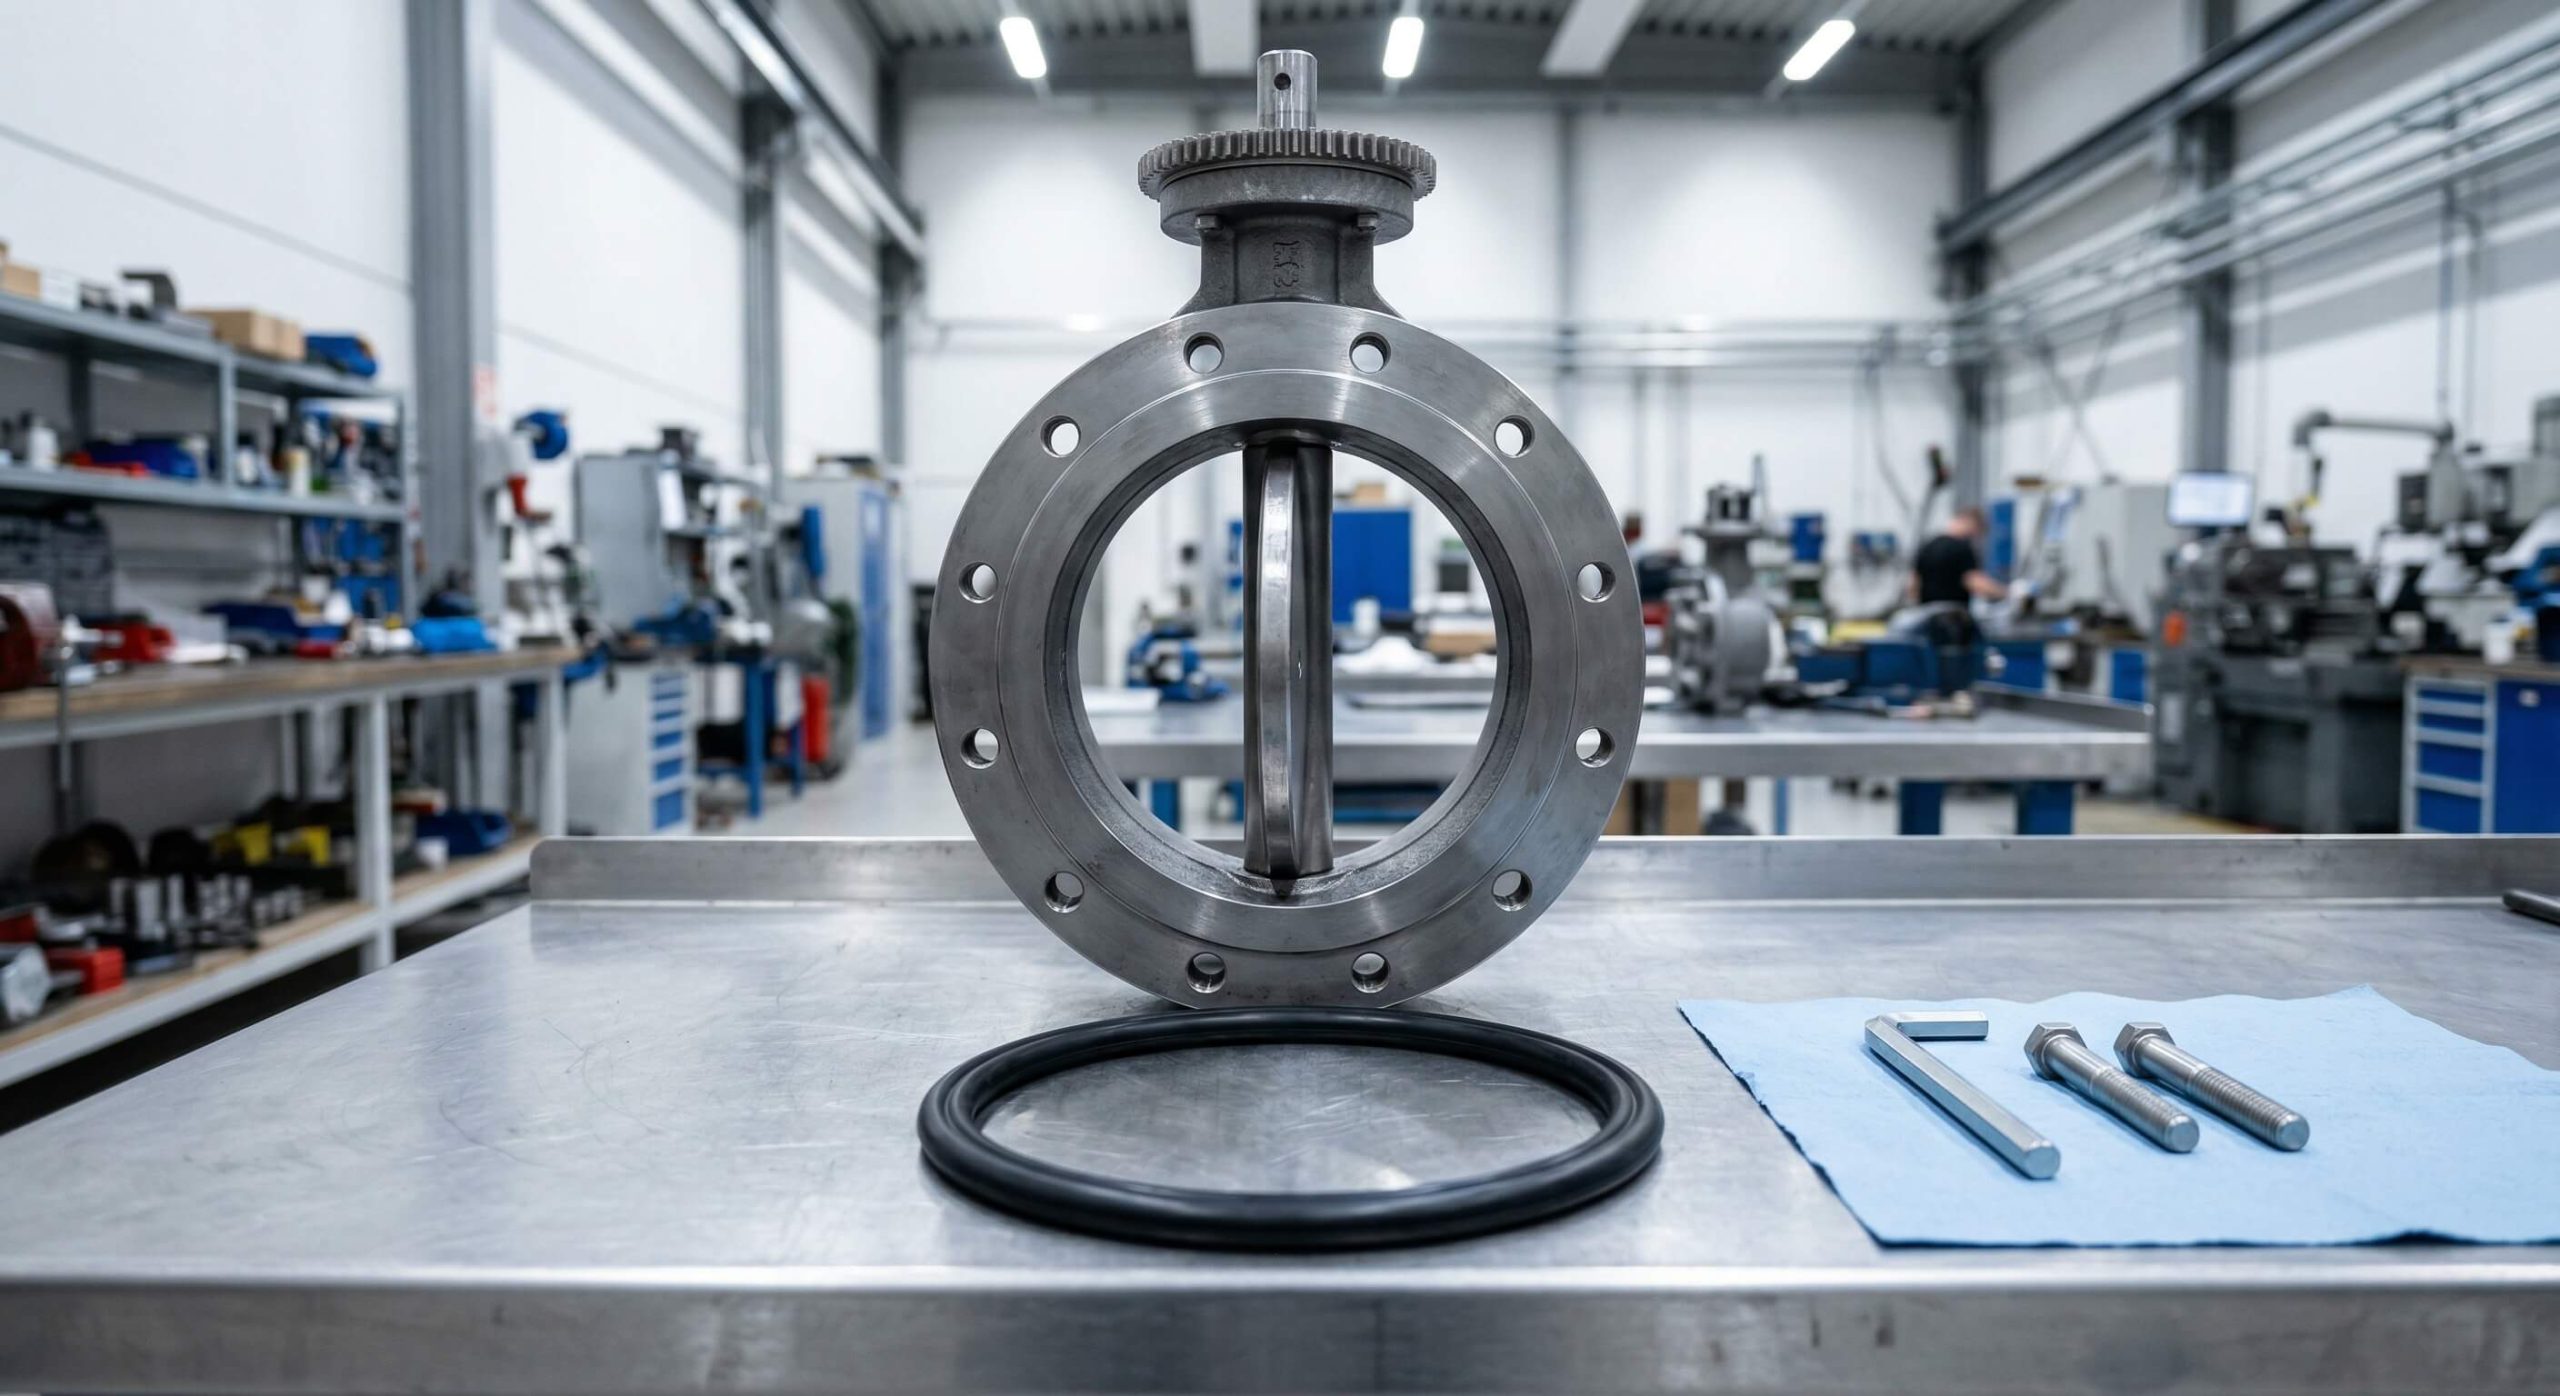
To replace a butterfly valve seat and seal ring, you must isolate the system, mark the alignment of the pressure plate, remove the fasteners using guide bolts for safety, and pry out the old elastomer before installing a new one. Failing to maintain a tight shut-off leads to internal bypassing, which compromises your plant safety and increases energy costs.
Small leaks often go unnoticed until they cause severe erosion to the valve disc and housing. This neglect results in expensive emergency shutdowns and labor-intensive repairs that could have been avoided with routine maintenance. By following a standardized replacement procedure, you ensure your butterfly valve seal ring butterfly valve seal ring performs to factory standards and extends the life of your fluid control system.
When to replace a butterfly valve seal ring?
You should replace the component when you observe internal bypass or visible material degradation during routine inspections. A faulty butterfly valve seal ring can lead to significant pressure loss and system inefficiency. Prompt action prevents secondary damage to the valve disc and housing.
Identifying failure symptoms
Look for specific red flags that indicate the elastomer has reached the end of its service life.
- Constant downstream leakage when closed
- Hardened or cracked rubber surfaces
- Excessive operating torque requirements
- Visual swelling of the sealing seat
Here is the deal. Most leaks stem from chemical incompatibility or abrasive wear that physically alters the seal profile. You must monitor these symptoms to avoid catastrophic failure.
Key Takeaway: Regular monitoring of leakage and torque is the best way to prevent unexpected operational downtime.
| Symptom | Probable Cause | Recommended Action |
|---|---|---|
| Internal Leakage | Seal wear or debris | Immediate replacement |
| High Torque | Swollen elastomer | Material compatibility check |
| Surface Cracks | Thermal fatigue | Upgrade to high-temp seal |
Routine diagnostics reveal that 80% of valve failures are attributed to seat degradation.
How to prepare a butterfly valve seal ring swap?
Preparation requires isolating the pipeline, relieving all internal pressure, and ensuring all actuators are locked out. Before handling the butterfly valve seal ring butterfly valve seal ring, you must verify that you have the correct replacement materials and specialized tools. Proper staging reduces the time your system remains offline.
Safety and staging requirements
Safety is your top priority when dealing with pressurized industrial systems.
- Shut down the main power supply to actuators.
- Ensure the valve is in the fully open (90°) position.
- Prepare a clean container for all countersunk screws.
- Stage M12 guide bolts for heavy pressure plates.
Think about this. A disorganized workspace leads to lost fasteners and increased reassembly time. You should clean all tools before starting the extraction process.
Key Takeaway: Comprehensive safety lockdowns and tool staging are essential for a professional and efficient seal replacement.
| Tool | Purpose | Status |
|---|---|---|
| Allen Key | Screw removal | Required |
| M12 Guide Bolts | Plate support | Essential for large valves |
| Marking Pen | Alignment tracking | Required |
Proper preparation can reduce actual repair time by nearly thirty percent.
How to remove an old butterfly valve seal ring?
Removing the old component involves marking the pressure plate alignment and carefully prying the ring from the disc groove. You must ensure the butterfly valve seal ring is separated uniformly to avoid bending the metal positioning stops. Using guide bolts is critical for managing the weight of the pressure plate in larger valve sizes.
Extracting the pressure plate
Using a marking pen to track the original orientation is a step you cannot skip.
- Mark the disc and plate with paint or charcoal.
- Replace two end screws with long guide bolts.
- Unscrew all remaining fasteners carefully.
- Support the plate weight to prevent sudden drops.
But wait, there’s more. You need to use symmetrical prying motions to release the seal without damaging the disc.
Key Takeaway: Using guide bolts and alignment marks ensures the removal process remains safe and repeatable.
| Step | Action | Tool |
|---|---|---|
| Alignment | Mark disc and plate | Paint/Charcoal |
| Support | Install guide bolts | M12 Bolts |
| Separation | Pry seal from groove | Wedge rods |
Mechanical support during extraction prevents workplace injuries and protects expensive valve components.
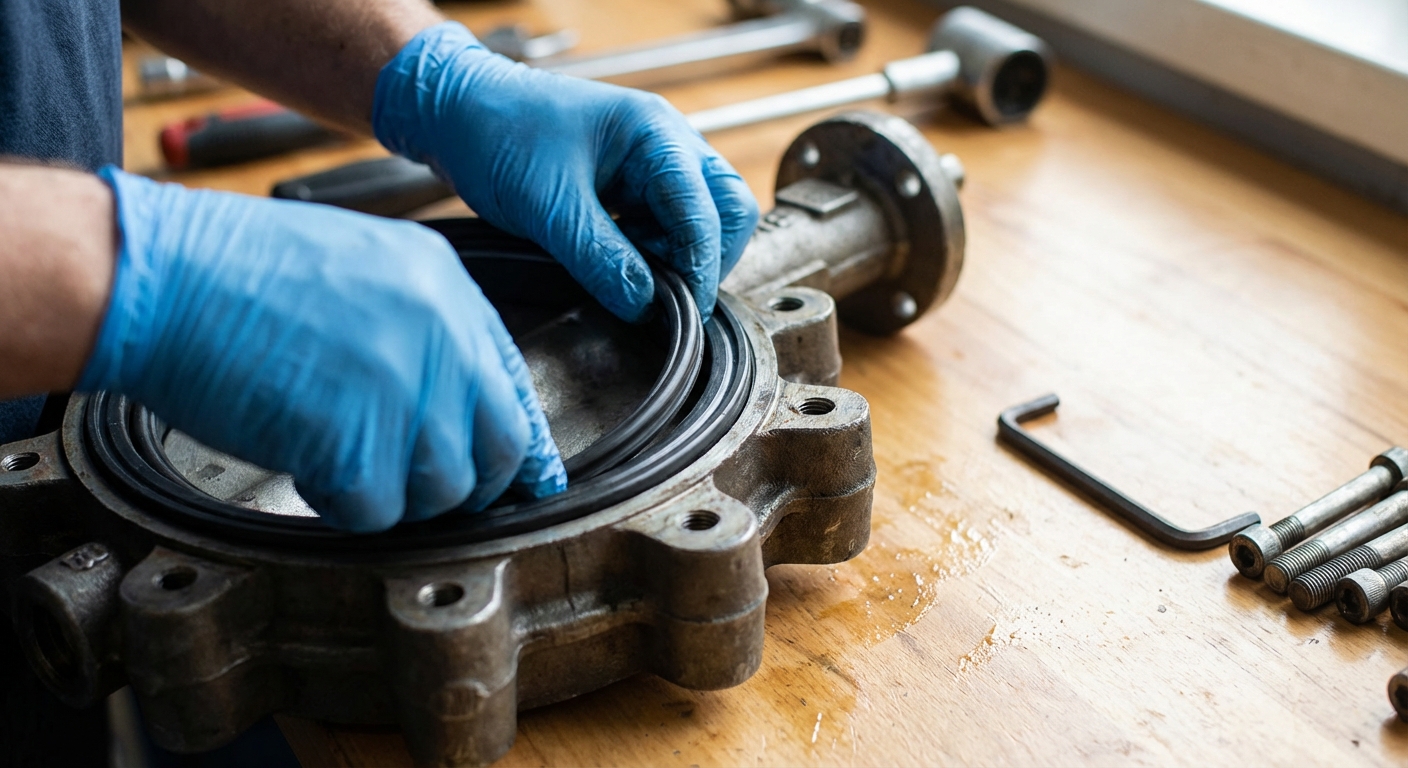
How to clean for a new butterfly valve seal ring?
Cleaning involves removing all oxidation, mineral deposits, and old lubricant from the sealing groove and pressure plate. A clean housing ensures the new butterfly valve seal ring butterfly valve seal ring sits flush against the metal surfaces. Any trapped debris can cause microscopic gaps that lead to immediate post-installation leakage.
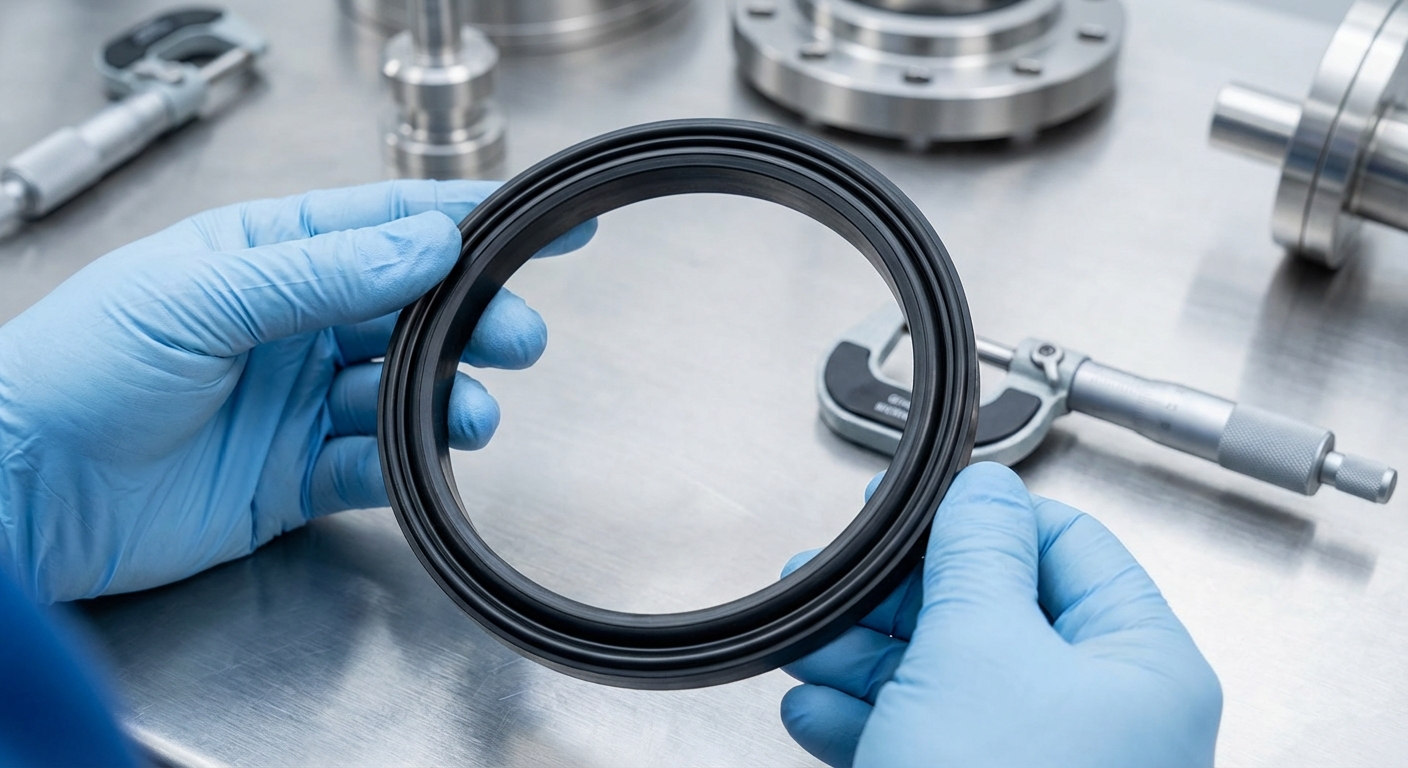
Surface preparation and inspection
You must inspect the metal positioning stops for signs of pitting or scoring that could compromise the seal.
- Remove scale using non-abrasive cleaners.
- Wipe surfaces with lint-free industrial cloths.
- Inspect the disc edge for sharp burrs.
- Verify the limit screw is in its original position.
It gets better. A perfectly clean seat groove allows the elastomer to expand and contract naturally under pressure.
Key Takeaway: Meticulous cleaning of the seat groove is the foundation of a leak-free valve rebuild.
| Inspection Area | Requirement | Method |
|---|---|---|
| Groove | No debris or scale | Non-abrasive scrub |
| Disc Edge | Smooth, no burrs | Visual inspection |
| Fasteners | Clean threads | Wire brush |
Removing oxidation improves the mechanical grip of the seal by up to fifteen percent.
What material is for your butterfly valve seal ring?
Selecting the right material depends on the chemical nature, temperature, and pressure of the fluid in your pipeline. A standard butterfly valve seal ring is often made of EPDM or NBR, but specialty applications may require PTFE or metal-backed designs. Choosing the wrong elastomer leads to premature swelling and failure.
Material selection criteria
Different environments demand specific material properties for long-term sealing success.
- EPDM: Best for water and low-pressure steam.
- NBR: Ideal for oils, fuels, and hydrocarbons.
- Viton: Required for high-temperature chemical service.
- PTFE: Best for highly aggressive acids and bases.
The best part? Matching the material to your specific media can triple the time between maintenance cycles. You should always consult the original specification sheet before ordering.
Key Takeaway: Material compatibility is the most significant factor in determining the operational life of your seal.
| Material | Temp Range | Best Application |
|---|---|---|
| EPDM | -20°C to 120°C | Municipal Water/Steam |
| NBR | -10°C to 80°C | Oil & Gas |
| Viton | -20°C to 200°C | Chemical Processing |
Selecting the correct elastomer reduces the risk of chemical swelling by nearly ninety percent.
How to install a new butterfly valve seal ring?
Installation requires precise alignment of the new elastomer and uniform tightening of the pressure plate fasteners. You must seat the butterfly valve seal ring butterfly valve seal ring evenly to ensure that compression is distributed across the entire diameter. Using a star pattern for bolt tightening prevents localized deformation of the rubber.
Seating and securing the ring
Aligning the marks you made during disassembly is the key to a successful fit.
- Place the ring into the clean disc groove.
- Reinstall the pressure plate on the guide bolts.
- Insert all original countersunk screws.
- Tighten fasteners in a cross-pattern sequence.
Look. If you tighten one side too quickly, the seal will ripple and fail during testing. You must maintain even tension throughout the process.
Key Takeaway: Uniform bolt tensioning in a star pattern ensures a flat and reliable sealing surface.
| Action | Priority | Note |
|---|---|---|
| Alignment | High | Match previous marks |
| Pattern | High | Star/Cross pattern |
| Final Torque | Medium | Follow manufacturer specs |
Star-pattern tightening ensures that seating pressure remains within a 5% variance across the disc.
How to test the replaced butterfly valve seal ring?
Testing involves verifying the mechanical movement of the disc and performing a pressure leak test. You should actuate the butterfly valve seal ring multiple times to ensure the rubber does not scuff or bind against the housing. A successful test confirms that the valve is ready to return to high-pressure service.
Validation and cycle testing
Performing a dry cycle test before repressurizing the line helps identify alignment issues early.
- Open and close the valve three full times.
- Check for smooth, consistent actuator torque.
- Perform a low-pressure air leak test.
- Conduct a full hydrostatic test if required.
In other words. The valve should operate without any “sticking” or unusual noises during the rotation. You are looking for a perfect 90-degree seal.
Key Takeaway: Multi-cycle testing and pressure validation are the only ways to guarantee a successful replacement.
| Test Type | Objective | Pass Criteria |
|---|---|---|
| Cycle Test | Verify movement | No binding or scuffing |
| Air Test | Low-pressure seal | Zero bubbles (soap test) |
| Hydro Test | High-pressure integrity | No visible bypass |
Pressure testing at 1.1 times the rated working pressure confirms long-term seal reliability.
How to maintain a butterfly valve seal ring?
Routine maintenance involves visual inspections and monitoring the pressure differential across the valve. Proper care for your butterfly valve seal ring butterfly valve seal ring includes keeping the fluid clean and avoiding “cracked” or partially open positions for throttling. Implementing a predictive schedule reduces the likelihood of emergency repairs.
Preventive care strategies
Extending the service life of your components requires a proactive approach to system health.
- Install upstream strainers to catch debris.
- Avoid high-velocity throttling near the seat.
- Lubricate the seal face if the system allows.
- Schedule annual visual inspections.
Let’s dive in. Most maintenance programs fail because they ignore environmental factors like UV exposure or extreme cold. You must adjust your schedule based on the site conditions.
Key Takeaway: Upstream filtration and regular inspections are the best ways to extend seal service life.
| Factor | Impact | Solution |
|---|---|---|
| Debris | Abrasive wear | Use Y-Strainers |
| Velocity | Seat erosion | Proper valve sizing |
| Temp | Thermal set | Correct material choice |
Proactive maintenance can extend the life of an elastomer seat by up to two years.
Why does a new butterfly valve seal ring still leak?
Leakage after a fresh replacement is usually caused by uneven tightening, trapped debris, or incorrect limit screw settings. If your butterfly valve seal ring fails to hold pressure, you must investigate the alignment of the disc relative to the seat. Even a small piece of grit can prevent the elastomer from forming a tight bond.
Troubleshooting post-install leaks
You should check for common installation errors before dismantling the entire assembly again.
- Uneven torque on pressure plate bolts.
- Misalignment of the disc center.
- Damage to the seal during prying.
- Incorrect elastomer size or material.
You might be wondering. Why does a brand-new seal fail? Often, it is because the original limit screws were moved, preventing the disc from reaching its full closed position.
Key Takeaway: Identifying the root cause of post-install leaks prevents repetitive labor and further part damage.
| Issue | Cause | Remedy |
|---|---|---|
| Edge Leak | Uneven bolt torque | Re-tighten in star pattern |
| Disc Bypass | Limit screw error | Reset travel limits |
| Surface Scuff | Misalignment | Re-center the disc |
Correcting bolt tension issues resolves nearly 60% of post-installation leakage problems.
How to optimize butterfly valve seal ring life?
Optimization involves choosing high-performance designs and following strict operational guidelines to minimize wear. Your butterfly valve seal ring butterfly valve seal ring will last significantly longer if you operate the valve within its specified pressure and temperature envelopes. High-cycle applications require seals with superior rebound characteristics.
Operational best practices
Following these professional guidelines will ensure you get the maximum value from your equipment.
- Operate within rated pressure limits.
- Use compatible lubricants during assembly.
- Minimize the duration of throttling.
- Replace seals during scheduled turnarounds.
Here’s the deal. A well-maintained valve is a cost-effective valve. You should treat the seal as a critical wear part and stock spares accordingly.
Key Takeaway: Following rated operating limits and using assembly lubricants maximizes the longevity of elastomer components.
| Practice | Benefit | Frequency |
|---|---|---|
| Lubrication | Reduced friction | At installation |
| Cleaning | Prevent abrasion | Monthly |
| Actuation | Prevent sticking | Bi-monthly |
Optimization strategies can reduce your annual valve replacement costs by over twenty-five percent.
Conclusion
A professional approach to seal replacement solves the persistent problems of internal leakage and operational downtime. By adhering to standardized removal, cleaning, and installation methods, you protect your system from costly erosion and ensure long-term performance. We provide the technical expertise and precision-engineered components needed to keep your fluid systems running at peak efficiency. Our vision is to empower engineers with reliable solutions that minimize risk and maximize productivity. If you need assistance with material selection or complex installations, contact us today for a free technical consultation.
Frequently Asked Questions
Can I replace the seal ring while the valve is in the pipeline?
Yes, but you must ensure the line is completely depressurized and isolated. Many large-diameter valves are designed for “in-line” maintenance to save time.
What is the best material for steam applications?
Generally, EPDM is the standard choice for low-pressure steam up to 120°C. For higher temperatures, you should move to a metal-seated design.
How do I know if my seal ring is worn out?
The most obvious sign is downstream leakage when the valve is fully closed. You may also notice an increase in the force needed to turn the handle or actuator.
Can I reuse the original countersunk screws?
Yes, provided they are clean and the threads are not damaged. However, replacing them with new stainless steel fasteners is often recommended for better corrosion resistance.
How tight should I tighten the pressure plate bolts?
You should follow the manufacturer’s torque specifications precisely. Over-tightening can crush the elastomer, while under-tightening allows fluid to bypass the ring.