
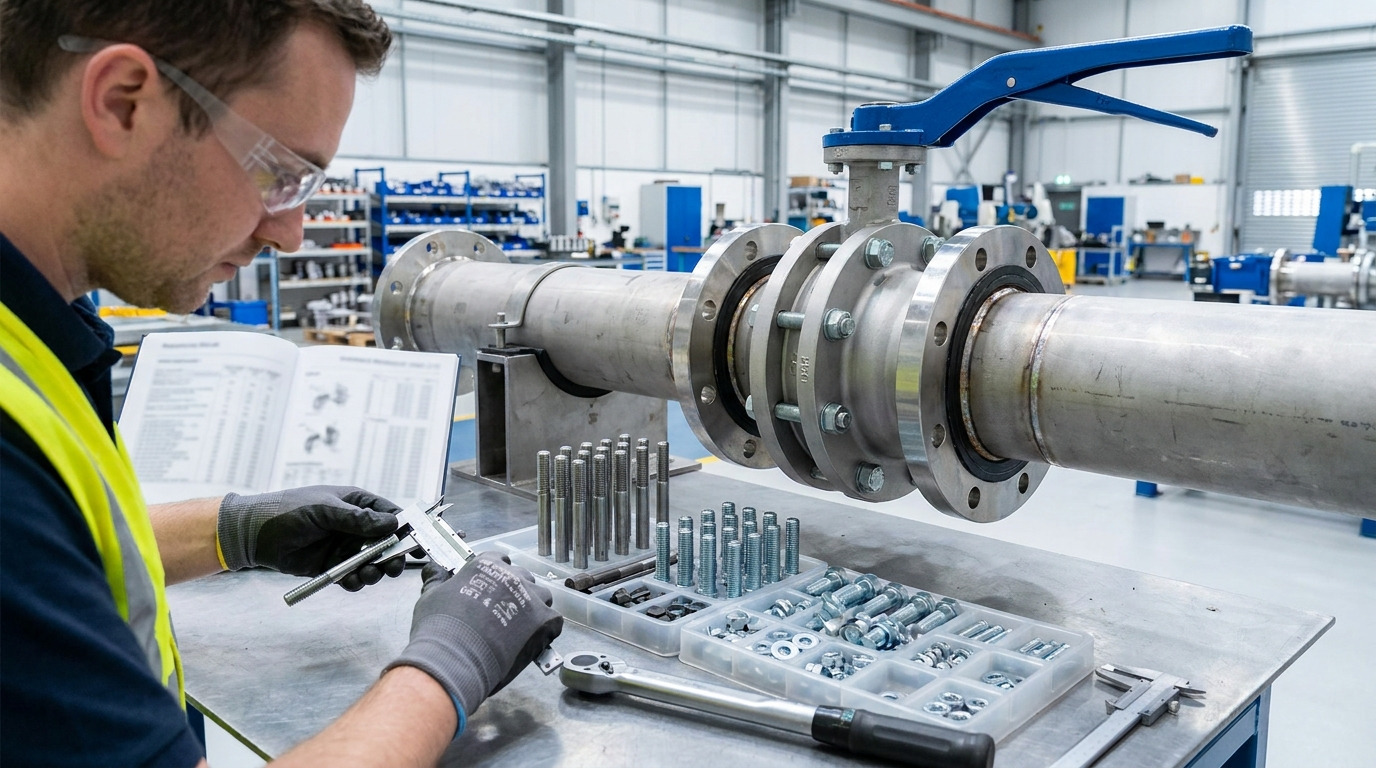
A 150 butterfly valve bolt chart is a technical reference guide detailing the exact bolt diameter, length, quantity, and thread pitch required to secure valves between Class 150 flanges. You are assembling a complex piping network when you suddenly notice pressure loss and fluid leaking from newly installed flange joints due to mismatched hardware. Ignoring this hardware mismatch risks permanent flange deformation, catastrophic line blowouts, and unscheduled plant shutdowns. By consulting a certified 150 butterfly valve bolt chart, you can select the exact fasteners needed to achieve a secure, long-lasting, and leak-proof seal.
What Are Essential Specs in a 150 Butterfly Valve Bolt Chart?
The essential specifications in a 150 butterfly valve bolt chart include bolt diameter, total length, thread type, and the specific quantity required per flange. Understanding these parameters ensures your piping connections can withstand the required operating pressures safely. A standard 150 butterfly valve bolt chart acts as the primary reference for piping engineers during assembly. Using accurate data from the chart prevents uneven stress distribution across the valve body.
Which Parameters Determine Fastener Compatibility?
The parameters that dictate fastener compatibility involve thread pitch variations, the material grade of the bolts, and the precise length required to clear both flanges and nuts. Proper sizing directly impacts the structural integrity of the entire piping network.
- Bolt diameter ensures proper fitment through the flange holes.
- Total length provides enough clearance for washers and nuts.
- Thread specifications determine the clamping force generation.
Ready for the good part? Specifying exact dimensions prevents costly installation delays. Always verify the physical flange thickness before ordering your bolting materials.
Key Takeaway: Correctly sizing your fasteners using technical guidelines prevents mechanical failures and extends the operational lifespan of your piping systems.
| Specification | Metric Value | Imperial Value | Typical Application |
|---|---|---|---|
| Diameter | M16 – M30 | 5/8″ – 1-1/4″ | General Piping |
| Length | 130mm – 340mm | 4″ – 12″ | Wafer and Lug |
| Quantity | 4 – 24 | 4 – 24 | Depending on Size |
| Grade | 8.8, 10.9 | B7, B8 | High Pressure |
Analyzing exact specifications reduces the risk of incorrect hardware purchases during facility construction.
What Bolt Types Feature in a 150 Butterfly Valve Bolt Chart?
The primary bolt types featured in a 150 butterfly valve bolt chart are hex head bolts, stud bolts, and socket head cap screws. Selecting the proper fastener style depends on your available installation space and specific flange configurations. Engineers regularly consult a 150 butterfly valve bolt chart to match fastener styles with valve body designs. Incorrect fastener styles can impede maintenance access later on.
Are Hex Head Bolts the Most Common Option?
Hex head bolts serve as the most universally applied fasteners for standard flange connections due to their ease of tightening with basic hand tools. Their robust design handles high torque loads without stripping the head.
- Easy to source from local hardware suppliers.
- Compatible with standard wrenches and impact tools.
- Ideal for open spaces with sufficient clearance.
This is where it gets interesting… Hex heads allow for rapid assembly during large-scale plant construction. They provide excellent visual indicators of proper seating against the flange surface.
Key Takeaway: Standardizing on hex head designs where space permits simplifies your maintenance tool requirements and speeds up routine inspections.
| Bolt Type | Head Style | Clearance Need | Best For |
|---|---|---|---|
| Hex Head | 6-Sided | High | Standard Flanges |
| Stud Bolt | None (Threaded) | Medium | Thick Flanges |
| Socket Head | Internal Hex | Low | Compact Spaces |
| Carriage | Round | High | Specialized |
Matching the fastener type to the available clearance prevents tool binding during final tightening.
How Do Standards Differ in a 150 Butterfly Valve Bolt Chart?
Standards differ in a 150 butterfly valve bolt chart primarily through measurement units, where ASME relies on inches and Threads Per Inch, while EN uses millimeters. Following the correct regional standard guarantees component interoperability across international projects. When cross-referencing a 150 butterfly valve bolt chart, confirm whether your system follows American or European design codes. Mixing metric and imperial hardware compromises thread engagement and reduces overall joint strength.
How Does ASME B16.5 Compare to EN 1092-1?
ASME B16.5 defines imperial measurements suited for North American industries, whereas EN 1092-1 sets metric requirements common in European markets. Using mismatched standard components leads to immediate assembly failure or gradual pressure loss.
- ASME uses Classes like 150, 300, and 600.
- EN systems utilize PN ratings like PN10 and PN16.
- Thread pitches cannot interlock safely between the two.
But here’s the kicker… Attempting to force metric nuts onto imperial threads will strip the metal instantly. You must verify the standard stamped on the flange body before purchasing hardware.
Key Takeaway: Strictly adhering to a single engineering standard across your facility prevents catastrophic thread stripping and ensures a reliable fluid seal.
| Standard | Unit System | Pressure Rating Format | Thread Type |
|---|---|---|---|
| ASME B16.5 | Imperial (Inches) | Class (e.g., 150) | UNC / UNF |
| EN 1092-1 | Metric (mm) | PN (e.g., PN16) | Metric Coarse |
| JIS B2220 | Metric (mm) | K (e.g., 10K) | Metric Coarse |
| BS 10 | Imperial (Inches) | Table (e.g., Table E) | BSW / BSF |
Separating metric and imperial fasteners in your inventory stops dangerous cross-threading incidents on the factory floor.
How Do You Install Hardware via a 150 Butterfly Valve Bolt Chart?
You install hardware by hand-threading all fasteners first, then applying sequential torque in a cross-pattern according to a 150 butterfly valve bolt chart. Proper tightening procedures prevent pinching the resilient valve seat during assembly. Relying on a 150 butterfly valve bolt chart helps technicians determine the exact sequence for securing the flange joints. Rushing this process guarantees future leaks.
Why Is Cross-Pattern Tightening Necessary?
Cross-pattern tightening distributes the clamping force evenly across the entire surface of the sealing ring, preventing localized material deformation. Tightening fasteners in a circular sequence causes the flange face to tilt and pinch the gasket.
- Begin at the 12 o’clock position.
- Move to the 6 o’clock position next.
- Proceed to 3 o’clock, then 9 o’clock.
What’s the real story? Uneven clamping is the leading cause of premature seat failure in rotary valves. Gradual torque application is the secret to a perfect seal.
Key Takeaway: Implementing a strict star-pattern tightening routine extends the life of your valve seats and eliminates startup leakage.
| Tightening Stage | Torque Applied | Action | Purpose |
|---|---|---|---|
| Stage 1 | Hand-tight | Hand assembly | Initial alignment |
| Stage 2 | 30% – 50% | Cross-pattern | Seating gasket |
| Stage 3 | 100% | Cross-pattern | Final sealing |
| Stage 4 | 100% | Circular check | Verify uniformity |
Breaking the tightening process into managed stages eliminates the risk of cracking brittle cast iron valve bodies.
What Faults Can a 150 Butterfly Valve Bolt Chart Resolve?
A 150 butterfly valve bolt chart resolves faults like insufficient clamping force, thread galling, and unequal flange spacing by specifying correct dimensions. Fixing these issues early prevents minor drips from escalating into major system failures. Consulting the 150 butterfly valve bolt chart allows maintenance teams to quickly identify why a joint keeps losing pressure. Using improperly sized hardware frequently causes the flange to warp permanently.
How Can You Stop Post-Installation Leakage?
You stop post-installation leakage by verifying the fastener torque matches the manufacturer specifications and ensuring the sealing faces remain perfectly parallel. Leaks usually indicate that the applied tension is too low or unevenly distributed.
- Inspect the rubber liner for pinch marks.
- Verify fasteners have not bottomed out in blind holes.
- Check for debris trapped between flange faces.
You might be wondering… Sometimes the hardware stretches under high pressure, causing a once-tight joint to weep fluid. Re-torquing the assembly after the initial system run often cures the issue.
Key Takeaway: Regularly auditing your flange connections with a torque wrench catches relaxing hardware before it causes an environmental spill.
| Common Fault | Root Cause | Preventive Action | Chart Reference |
|---|---|---|---|
| Joint Leakage | Uneven torque | Use cross-pattern | Torque values |
| Stripped Thread | Wrong pitch | Match standards | Thread specs |
| Flange Bending | Over-tightening | Calibrate tools | Max torque |
| Bolt Snapping | Low tensile grade | Upgrade material | Grade specs |
Diagnosing connection failures systematically saves hours of unnecessary troubleshooting during emergency shutdowns.
What Selection Rules Apply to a 150 Butterfly Valve Bolt Chart?
The main selection rules require matching the fastener grade to the system pressure and aligning dimensions with the 150 butterfly valve bolt chart. Following strict procurement guidelines stops substandard materials from entering your high-pressure lines. A detailed 150 butterfly valve bolt chart acts as a filter against purchasing incorrect or weak hardware. Bypassing these rules often voids the manufacturer warranty on the valve.
How Should You Choose Between Carbon and Stainless Steel?
You should choose carbon steel for standard indoor applications and select stainless steel for corrosive environments or outdoor installations. Material selection dictates how long the fastener will survive before rusting locks the joint together.
- Carbon steel offers high strength at a lower cost.
- Stainless steel resists rust but may suffer from galling.
- Coated hardware bridges the gap between cost and protection.
Here is the deal… Using cheap carbon steel on a coastal water line guarantees a rusted, immovable mess within six months. Spend the extra budget on corrosion resistance upfront.
Key Takeaway: Aligning your hardware material with the specific environmental conditions drastically reduces future maintenance headaches.
| Material | Environment | Cost | Corrosion Resistance |
|---|---|---|---|
| Carbon Steel | Indoor / Dry | Low | Poor |
| Stainless 304 | Damp / Mild | Medium | Good |
| Stainless 316 | Marine / Harsh | High | Excellent |
| PTFE Coated | Chemical | High | Superior |
Matching metallurgical properties to the conveyed fluid protects the structural integrity of your chemical piping systems.
How Does Flange Style Alter a 150 Butterfly Valve Bolt Chart?
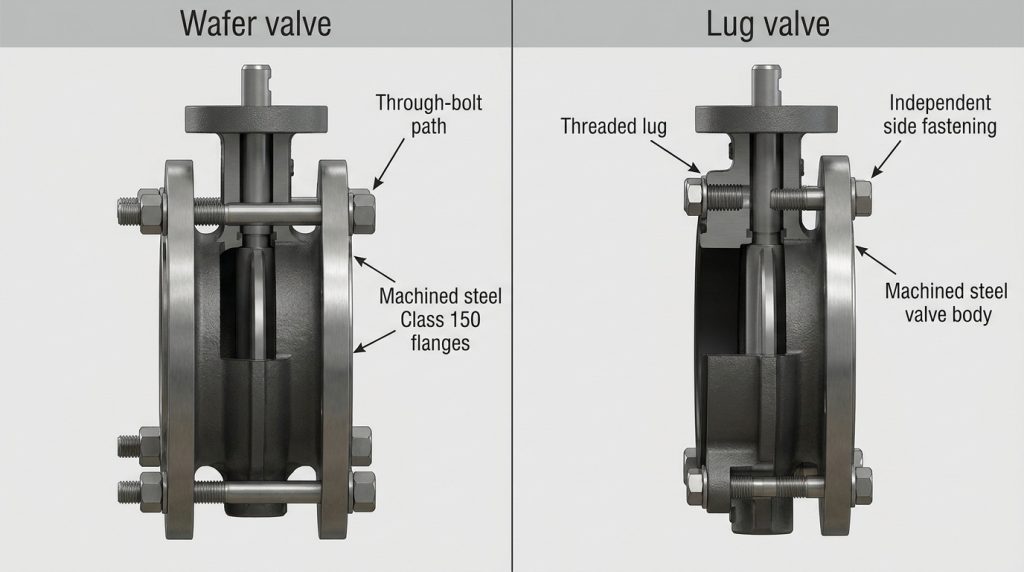
Flange style alters the 150 butterfly valve bolt chart by changing the required fastener length and specifying whether nuts are needed for assembly. Wafer designs use long hardware that passes entirely through the assembly, while lug styles use shorter pieces. Reviewing a 150 butterfly valve bolt chart clarifies the exact hardware differences between wafer and lug installations. Ignoring the flange style leads to ordering parts that physically cannot connect.
Why Do Lug Valves Require Different Fasteners?
Lug valves require different fasteners because their threaded inserts accept hardware independently from both sides of the piping system. This design allows you to remove downstream piping without depressurizing the upstream section.
- Wafer valves need long through-bolts and two nuts.
- Lug valves need shorter cap screws or studs.
- Lug installations require double the total hardware count.
Truth be told… Many junior technicians accidentally order long through-bolts for lug bodies, completely stalling the installation process. Always double-check the body style before purchasing.
Key Takeaway: Understanding the mechanical differences between valve body styles ensures you order the correct quantities and lengths of hardware.
| Valve Style | Bolt Type Used | Nuts Required? | Dead-End Service? |
|---|---|---|---|
| Wafer | Long Through-Bolt | Yes (2 per bolt) | No |
| Lug | Short Cap Screw | No (Threads in body) | Yes |
| Flanged | Standard Hex | Yes (1 per bolt) | Yes |
| Grooved | Coupling Pins | N/A | No |
Selecting the appropriate body style based on system modularity makes future pipe modifications significantly easier.
Why Is Material Key in a 150 Butterfly Valve Bolt Chart?
Material is key in a 150 butterfly valve bolt chart because it determines the tensile strength and the chemical resistance of the connection. Fasteners must expand and contract at similar rates to the surrounding pipe during thermal cycling. Evaluating material properties on a 150 butterfly valve bolt chart prevents galvanic corrosion between dissimilar metals. Weak materials will shear under the immense pressure of a water hammer event.
Can Galvanic Corrosion Destroy Your Connections?
Galvanic corrosion can quickly destroy your connections if you pair incompatible metals, like carbon steel and brass, in a damp environment. The more reactive metal will act as an anode and rapidly rust away, compromising the joint.
- Use isolation sleeves to separate dissimilar metals.
- Apply anti-seize compounds during assembly.
- Select matching materials for flanges and fasteners.
Ready for the truth? A poorly planned material combination will dissolve the fasteners from the inside out, leaving the joint looking fine until it blows apart. Proper material science is non-negotiable.
Key Takeaway: Isolating incompatible metals using specialized washers and sleeves preserves the longevity of your industrial piping network.
| Metal A | Metal B | Galvanic Risk | Mitigation Strategy |
|---|---|---|---|
| Carbon Steel | Stainless Steel | Moderate | Coat threads |
| Aluminum | Copper | Severe | Isolation kits |
| Galvanized | Brass | High | Dielectric union |
| Stainless | Stainless | Low | Anti-galling paste |
Applying proper metallurgical compatibility rules stops invisible deterioration from weakening your critical infrastructure.
How Does Torque Link to a 150 Butterfly Valve Bolt Chart?
Torque links directly to a 150 butterfly valve bolt chart by dictating the exact rotational force needed to achieve optimal gasket compression. Applying the correct torque ensures the resilient seat seals against the disc without tearing. Following torque values listed alongside a 150 butterfly valve bolt chart guarantees consistent assembly quality across different technicians. Guessing the torque with an impact wrench usually ruins the internal rubber lining.
Why Is Over-Tightening So Dangerous?
Over-tightening is dangerous because it can stretch the fasteners past their yield point, permanently weakening the steel structure. It also crushes the elastomer seat, pushing rubber into the flow path and restricting the disc movement.
- Stretched fasteners lose their clamping ability permanently.
- Crushed seats cause the valve torque to spike.
- Excessive force can crack brittle iron flanges.
Consider this… More force does not equal a better seal; it only equals broken parts. Using a properly calibrated torque wrench is the only way to build reliable systems.
Key Takeaway: Respecting the manufacturer’s maximum torque limits protects the internal components and guarantees smooth rotary operation.
| Pipe Size | Torque (Nm) | Torque (ft-lbs) | Warning Indicator |
|---|---|---|---|
| 2″ – 4″ | 30 – 45 | 22 – 33 | Stiff operation |
| 5″ – 8″ | 60 – 80 | 44 – 59 | Rubber extrusion |
| 10″ – 14″ | 100 – 130 | 74 – 96 | Thread stretching |
| 16″ – 24″ | 180 – 220 | 132 – 162 | Flange bowing |
Standardizing torque procedures across your maintenance department eliminates subjective tightening habits and improves safety.
How Can a 150 Butterfly Valve Bolt Chart Guide Maintenance?
A 150 butterfly valve bolt chart guides maintenance by acting as a checklist for replacing fatigued hardware during scheduled facility turnarounds. Technicians use it to pre-order replacement parts before taking the piping system offline. Reviewing the 150 butterfly valve bolt chart allows planners to accurately forecast budget needs for consumable hardware. Replacing rusted fasteners proactively stops emergency leaks before they happen.
When Should You Replace Existing Hardware?
You should replace existing hardware whenever you disassemble a flange joint, or if visible rust has compromised the thread integrity. Reusing old fasteners introduces the risk of metal fatigue and unpredictable tension loading during reassembly.
- Replace hardware showing severe pitting or rust.
- Discard fasteners that have been over-torqued.
- Swap out parts if threads feel rough during hand-threading.
Here is the bottom line… The cost of new hardware is negligible compared to the cost of cleaning up an industrial fluid leak. Never compromise on fresh fasteners during critical repairs.
Key Takeaway: Treating flange fasteners as single-use consumable items drastically improves the safety and reliability of your piping network.
| Condition | Visual Sign | Action Required | Priority Level |
|---|---|---|---|
| Surface Rust | Brown dusting | Clean and monitor | Low |
| Pitting | Deep craters | Replace immediately | High |
| Stretched | Thread gaps | Replace immediately | Critical |
| Clean | Smooth finish | Re-lubricate | Normal |
Implementing a strict hardware replacement policy during routine maintenance prevents unexpected mechanical failures.
conclusion
To sum up, mastering fastener specifications ensures your fluid control systems operate safely and efficiently without unexpected downtime. Accurate hardware selection guarantees tight seals, prevents structural damage, and makes routine maintenance highly predictable. Whether you are dealing with aggressive chemicals or high-pressure water lines, proper assembly techniques make all the difference. We believe in providing robust, engineered solutions that keep your processes flowing safely. For precise fluid control guidance, please contact us today to equip your next industrial project.
FAQ
Q1: Can I use metric fasteners on an ASME standard flange?
No, because the thread pitches and physical diameters do not properly align. Mixing standards creates weak joints and causes severe thread damage during installation.
Q2: What’s the best way to determine the correct fastener length?
Consulting your manufacturer’s specific dimension chart provides the most accurate length. The length must account for the flanges, valve body, gasket thickness, and enough clearance for nuts.
Q3: How do I know if my fasteners are over-torqued?
You will notice the rubber seat extruding into the pipeline or the disc becoming extremely difficult to turn. Stretched threads also indicate that the maximum torque limit was exceeded.
Q4: Can I reuse studs after taking a joint apart?
No, it is highly recommended to install fresh hardware during reassembly. Used fasteners suffer from invisible metal fatigue and cannot hold consistent torque values.
Q5: What’s the best material for highly corrosive environments?
Stainless steel 316 or specialized PTFE-coated fasteners offer superior protection. Carbon steel will rapidly oxidize and fail if exposed to harsh chemicals or marine conditions.